MiniSeq
Introduction
[WORK IN PROGRESS]
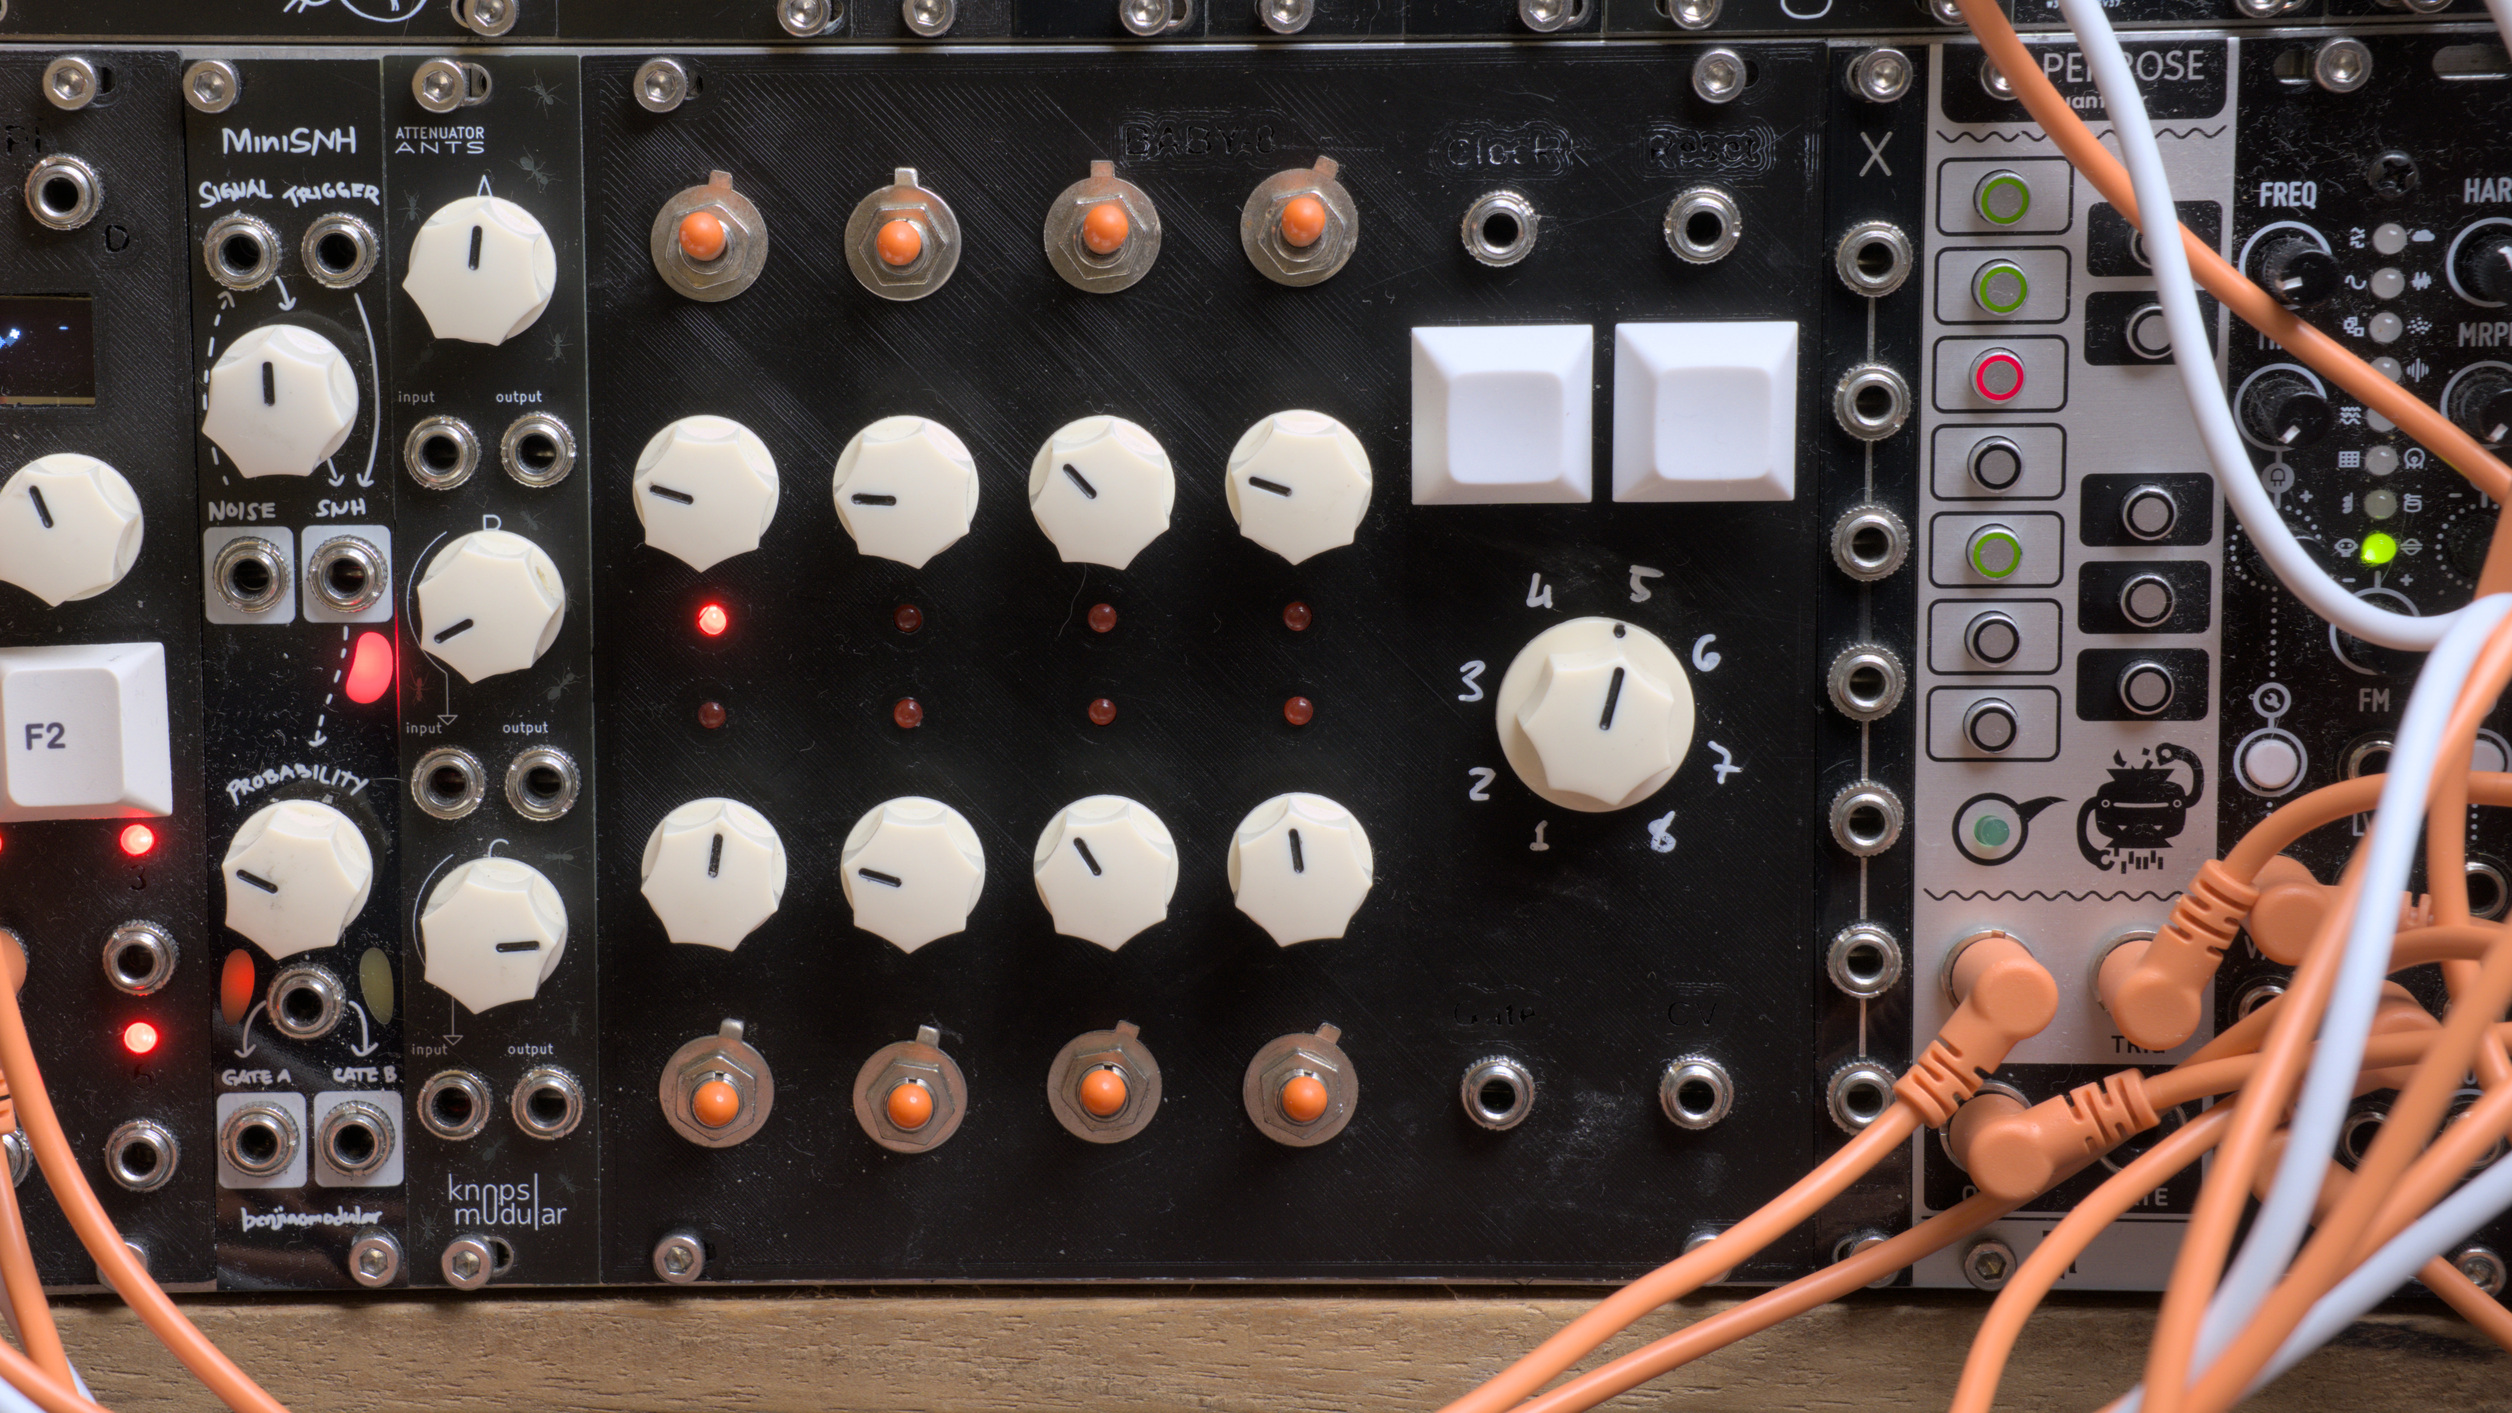
This is my second time building a Baby-8 step CV sequencer since my plexiglass Baby-8 build from two years ago. This, time I added a gate output, a reset input, and a step length control. I’m glad i added the step length controls because it lets me pick odd step numbers like 5 and 7, which keeps things interesting.
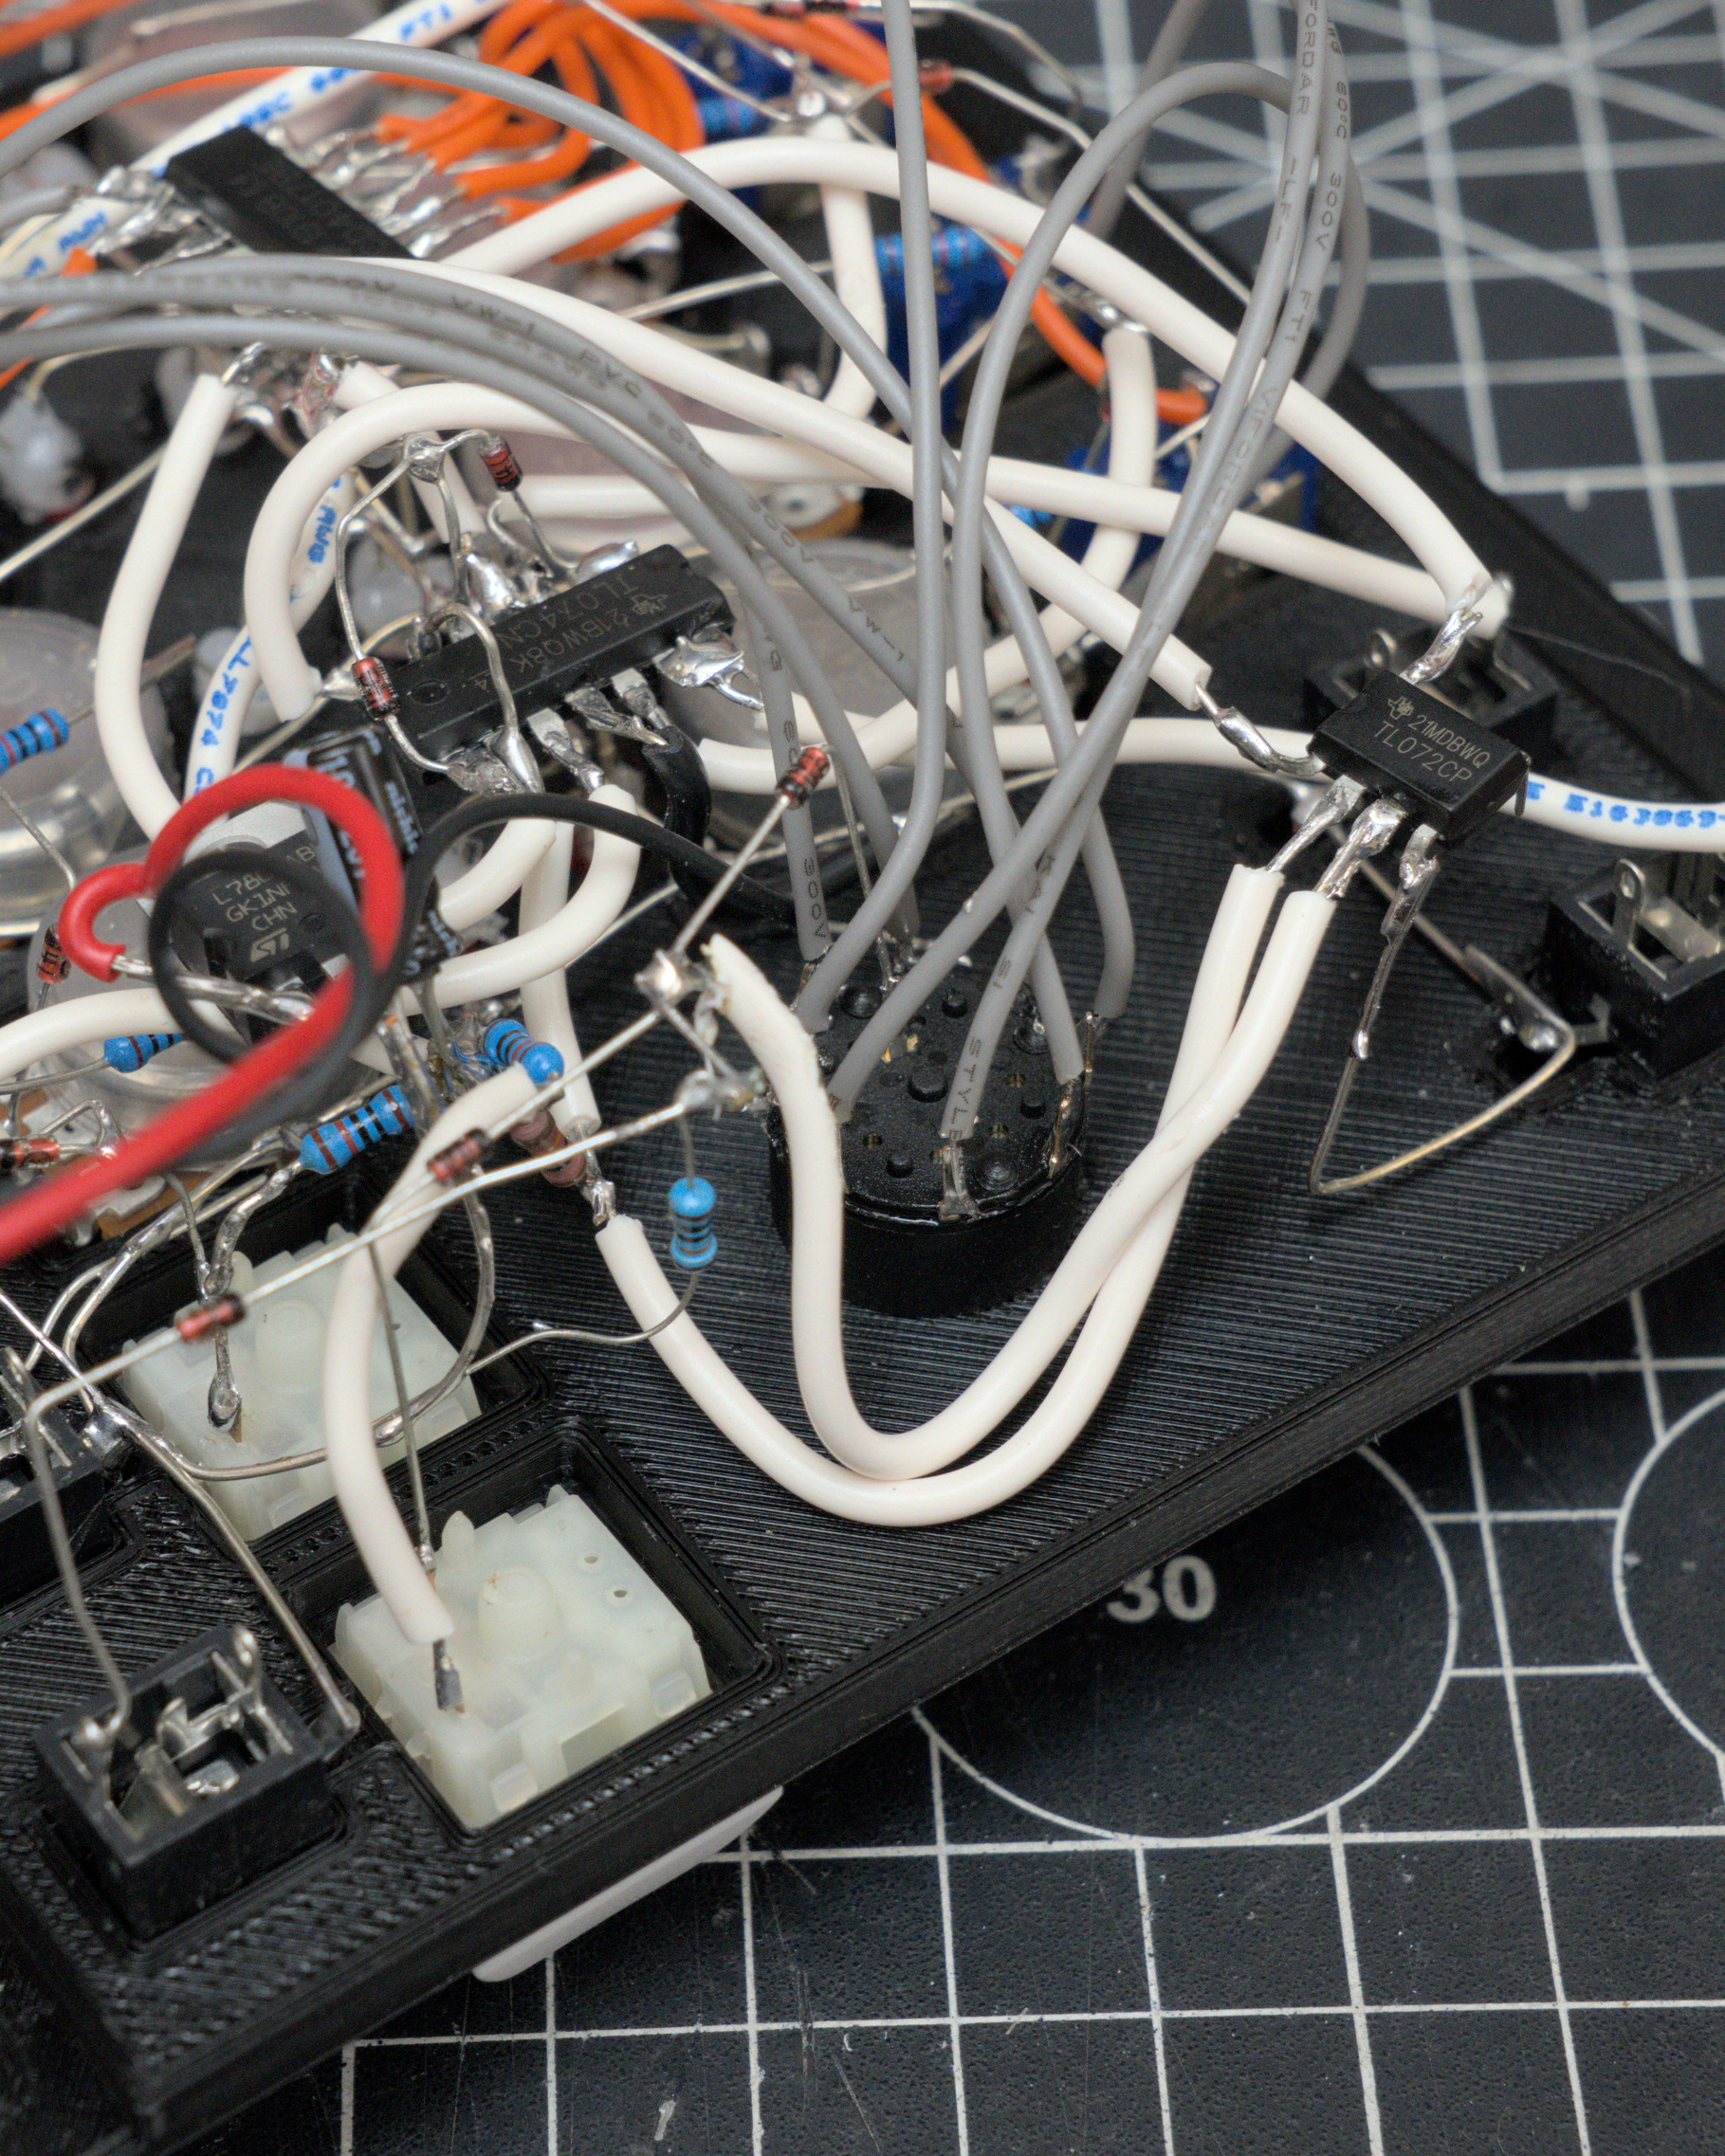
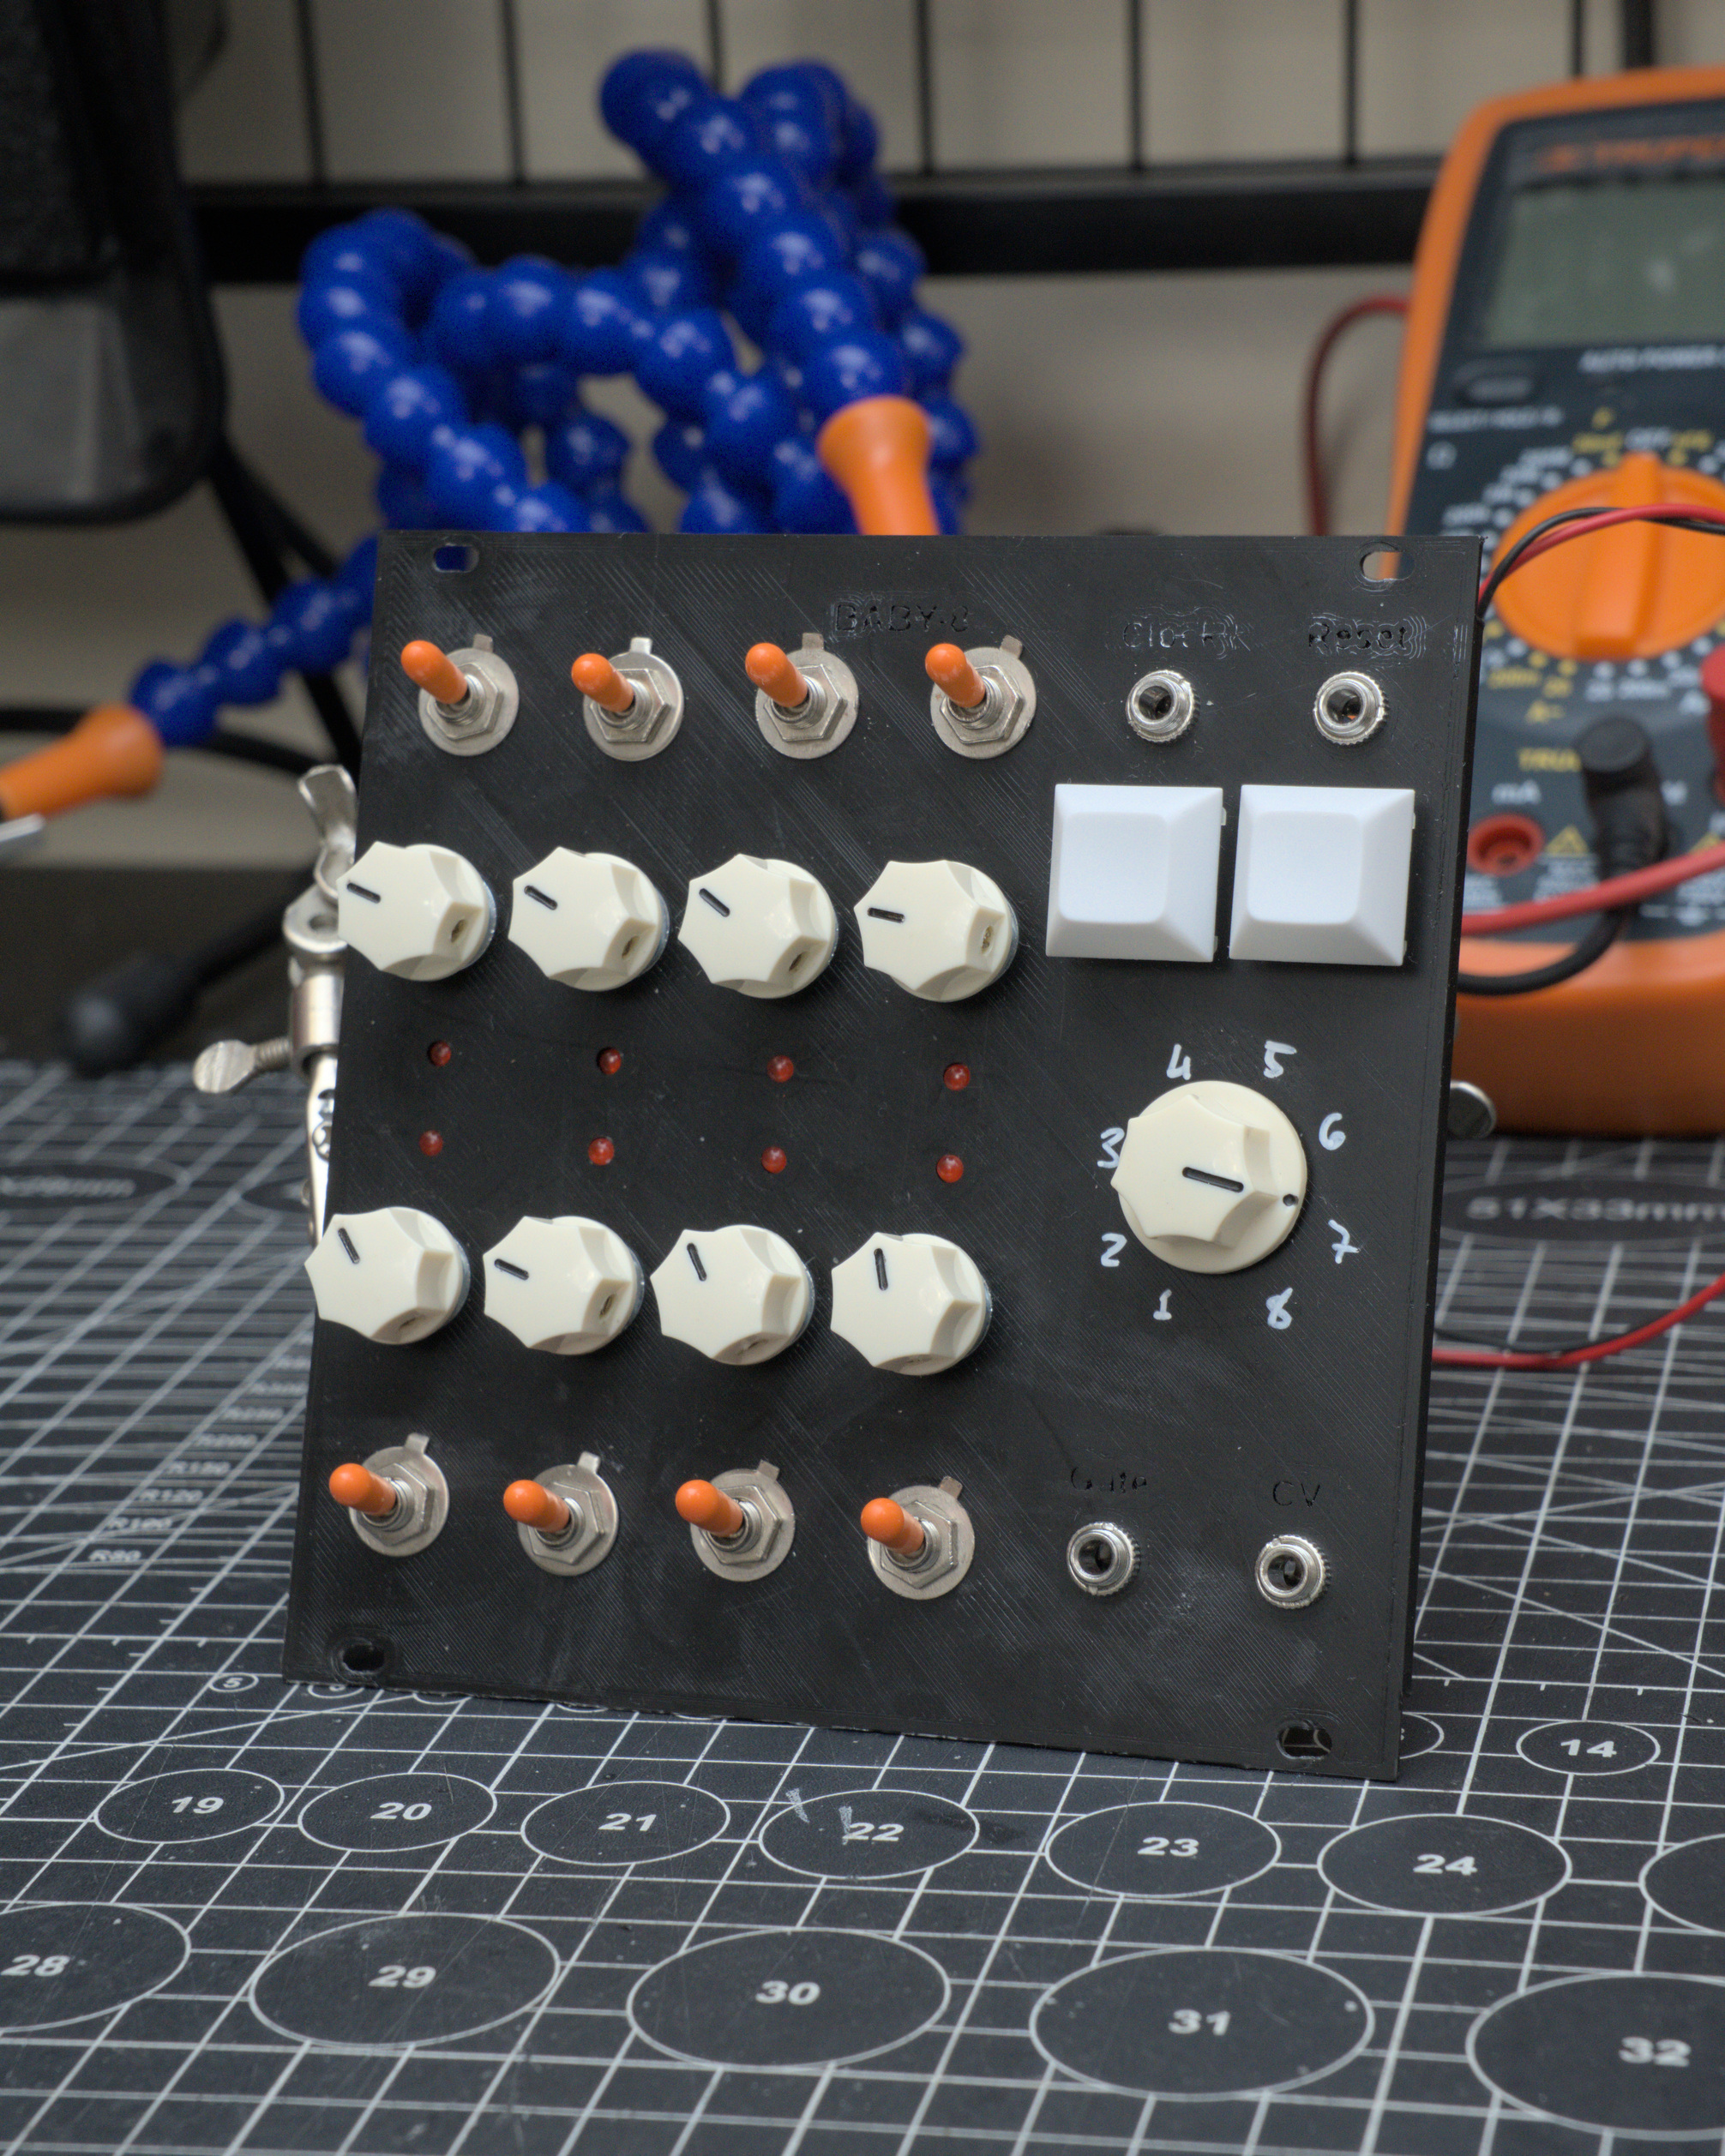
The first iteration was built on a 3D printed panel and with point-to-point circuitry. No, I probably won’t make a wiring diagram for this. 😆
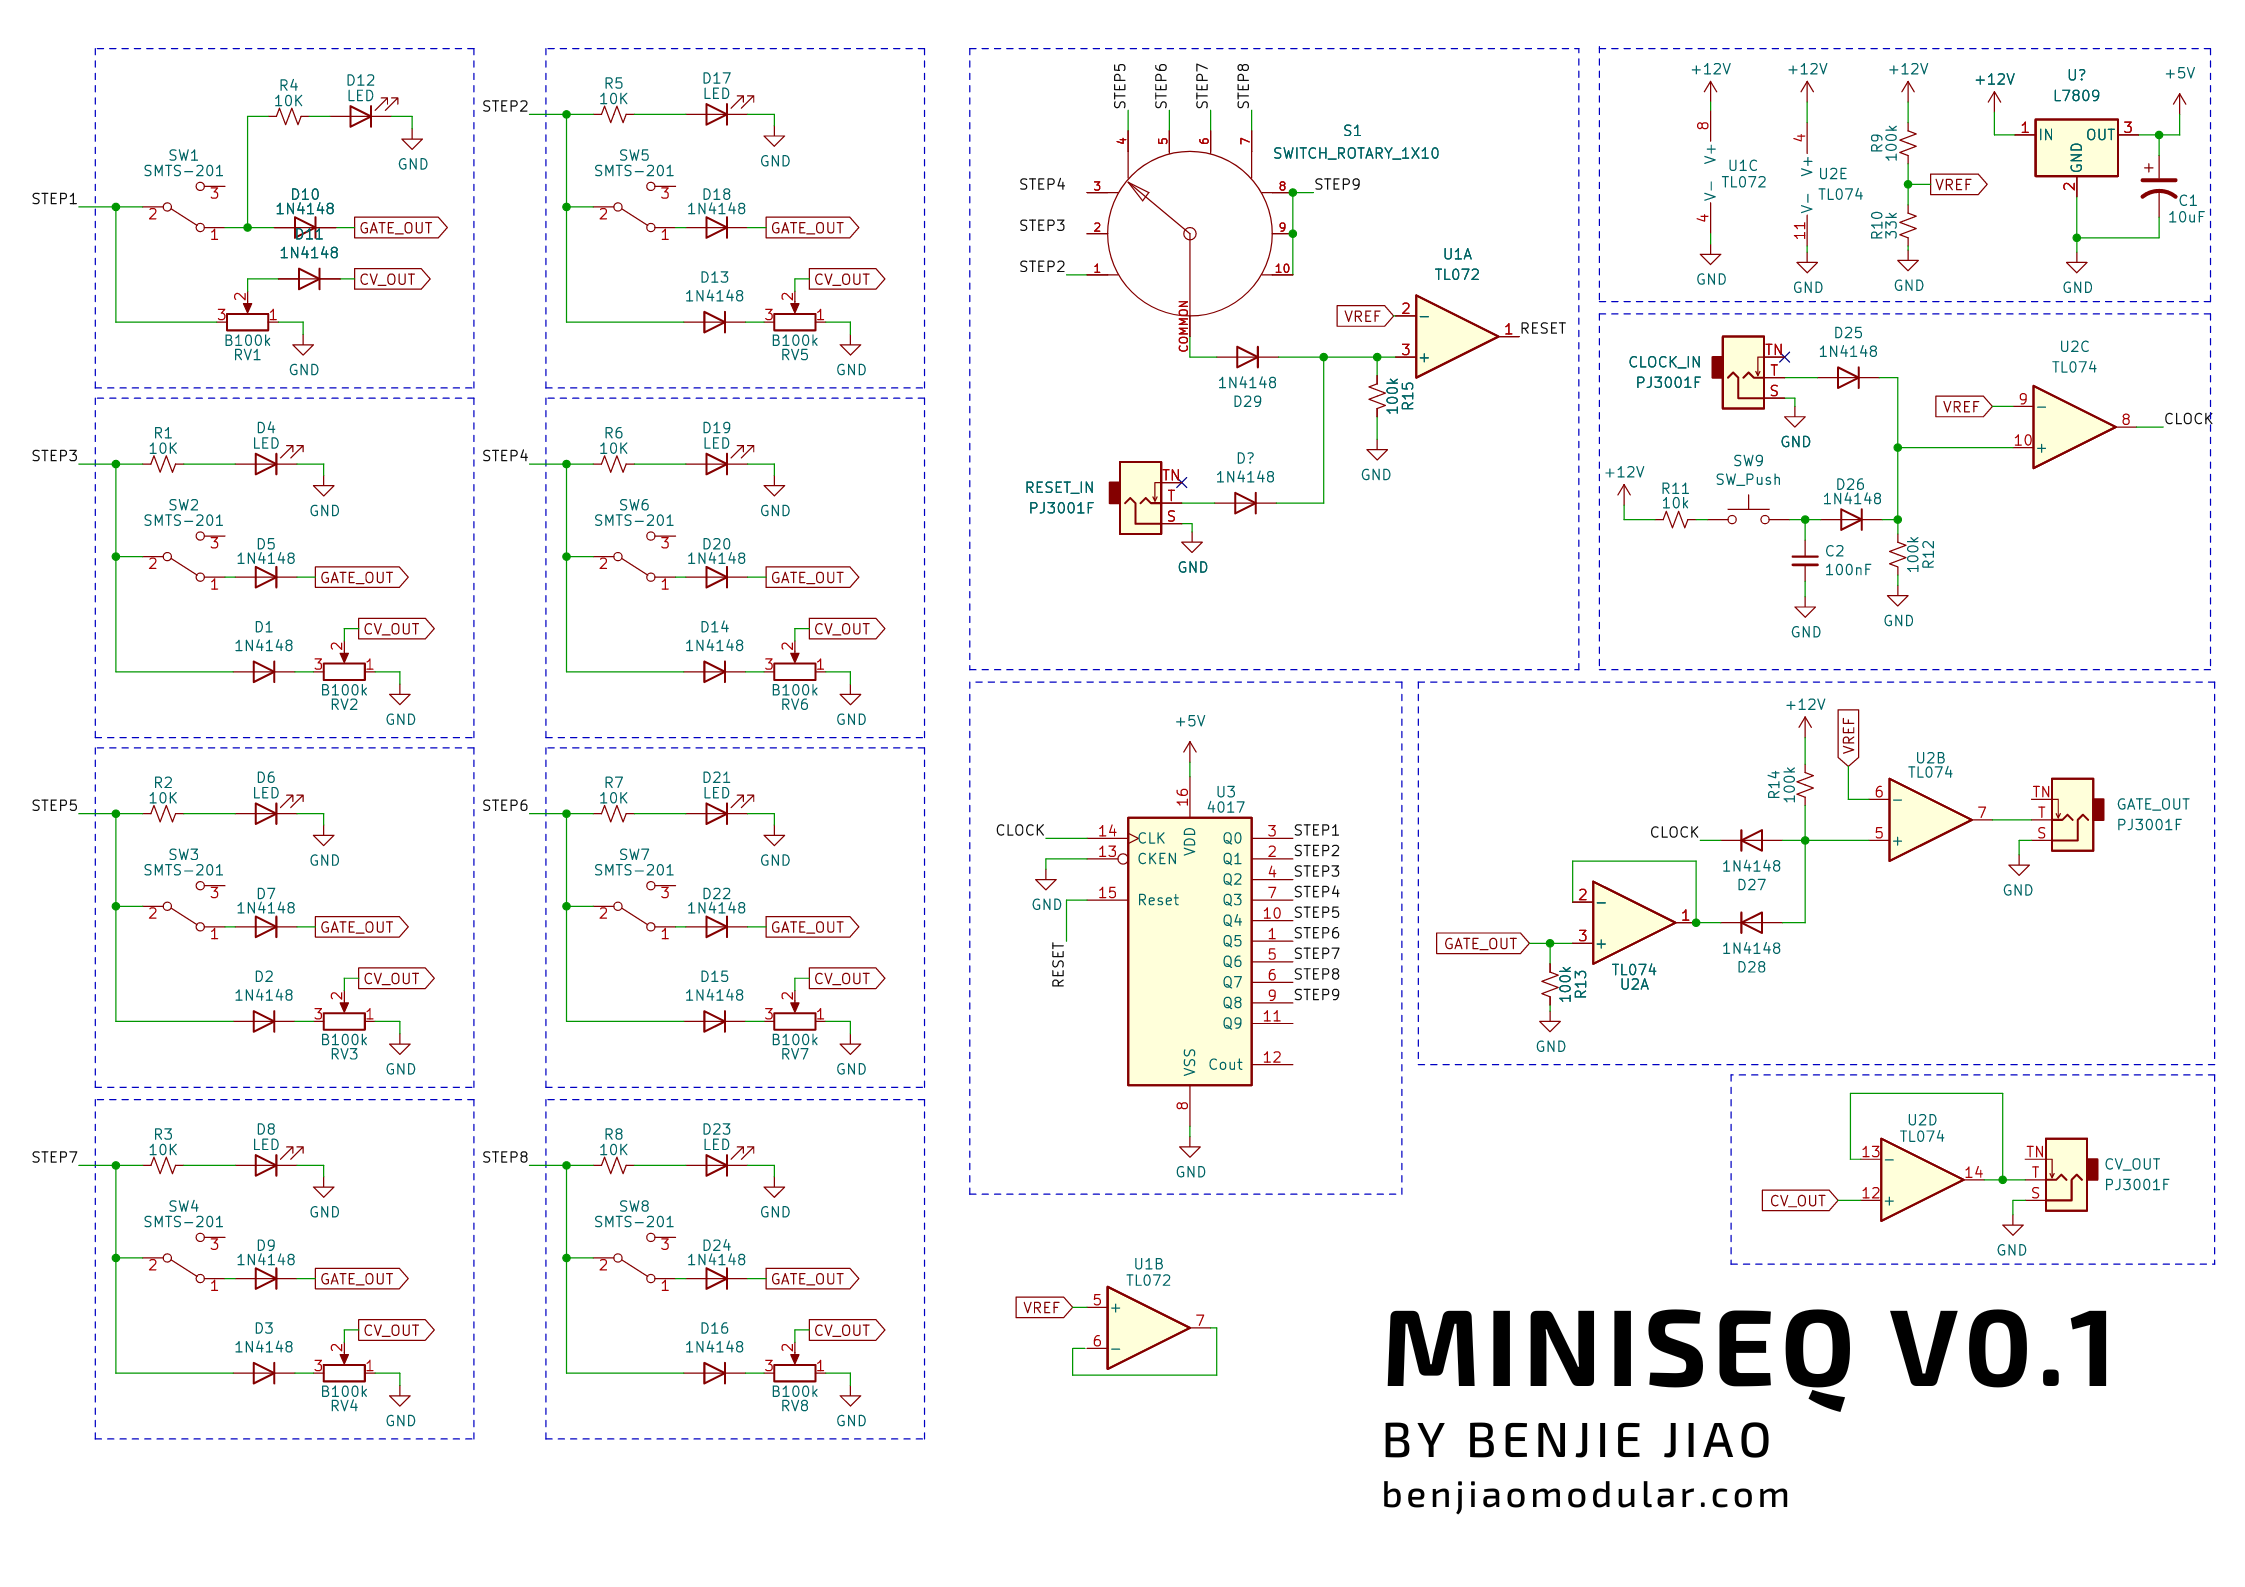
Schematics
This one’s a basic Baby-8 sequencer based on the CD4017 Decade Counter.
The gate output is controlled by the toggle switches. For this, the CD4017 output is run through an AND-gate with the clock input so the gate is exactly the length of the clock input.
This was also my first time using EC-11 Rotary Switches. I use them for selecting sequence length.
Conclusion
I’ve always dreaded building another handwired Baby-8 due to the amount of wiring it requires, but I’m glad I did it. It works great when paired with a quantizer.
I will release a PCB for this soon! Follow me on Instagram @benjiaomodular for more updates.