MiniOSC v2.x
An analog oscillator based on the 40106 chip. It’s a remake of my very first PCB-based module. I added PWM and Sync inputs.
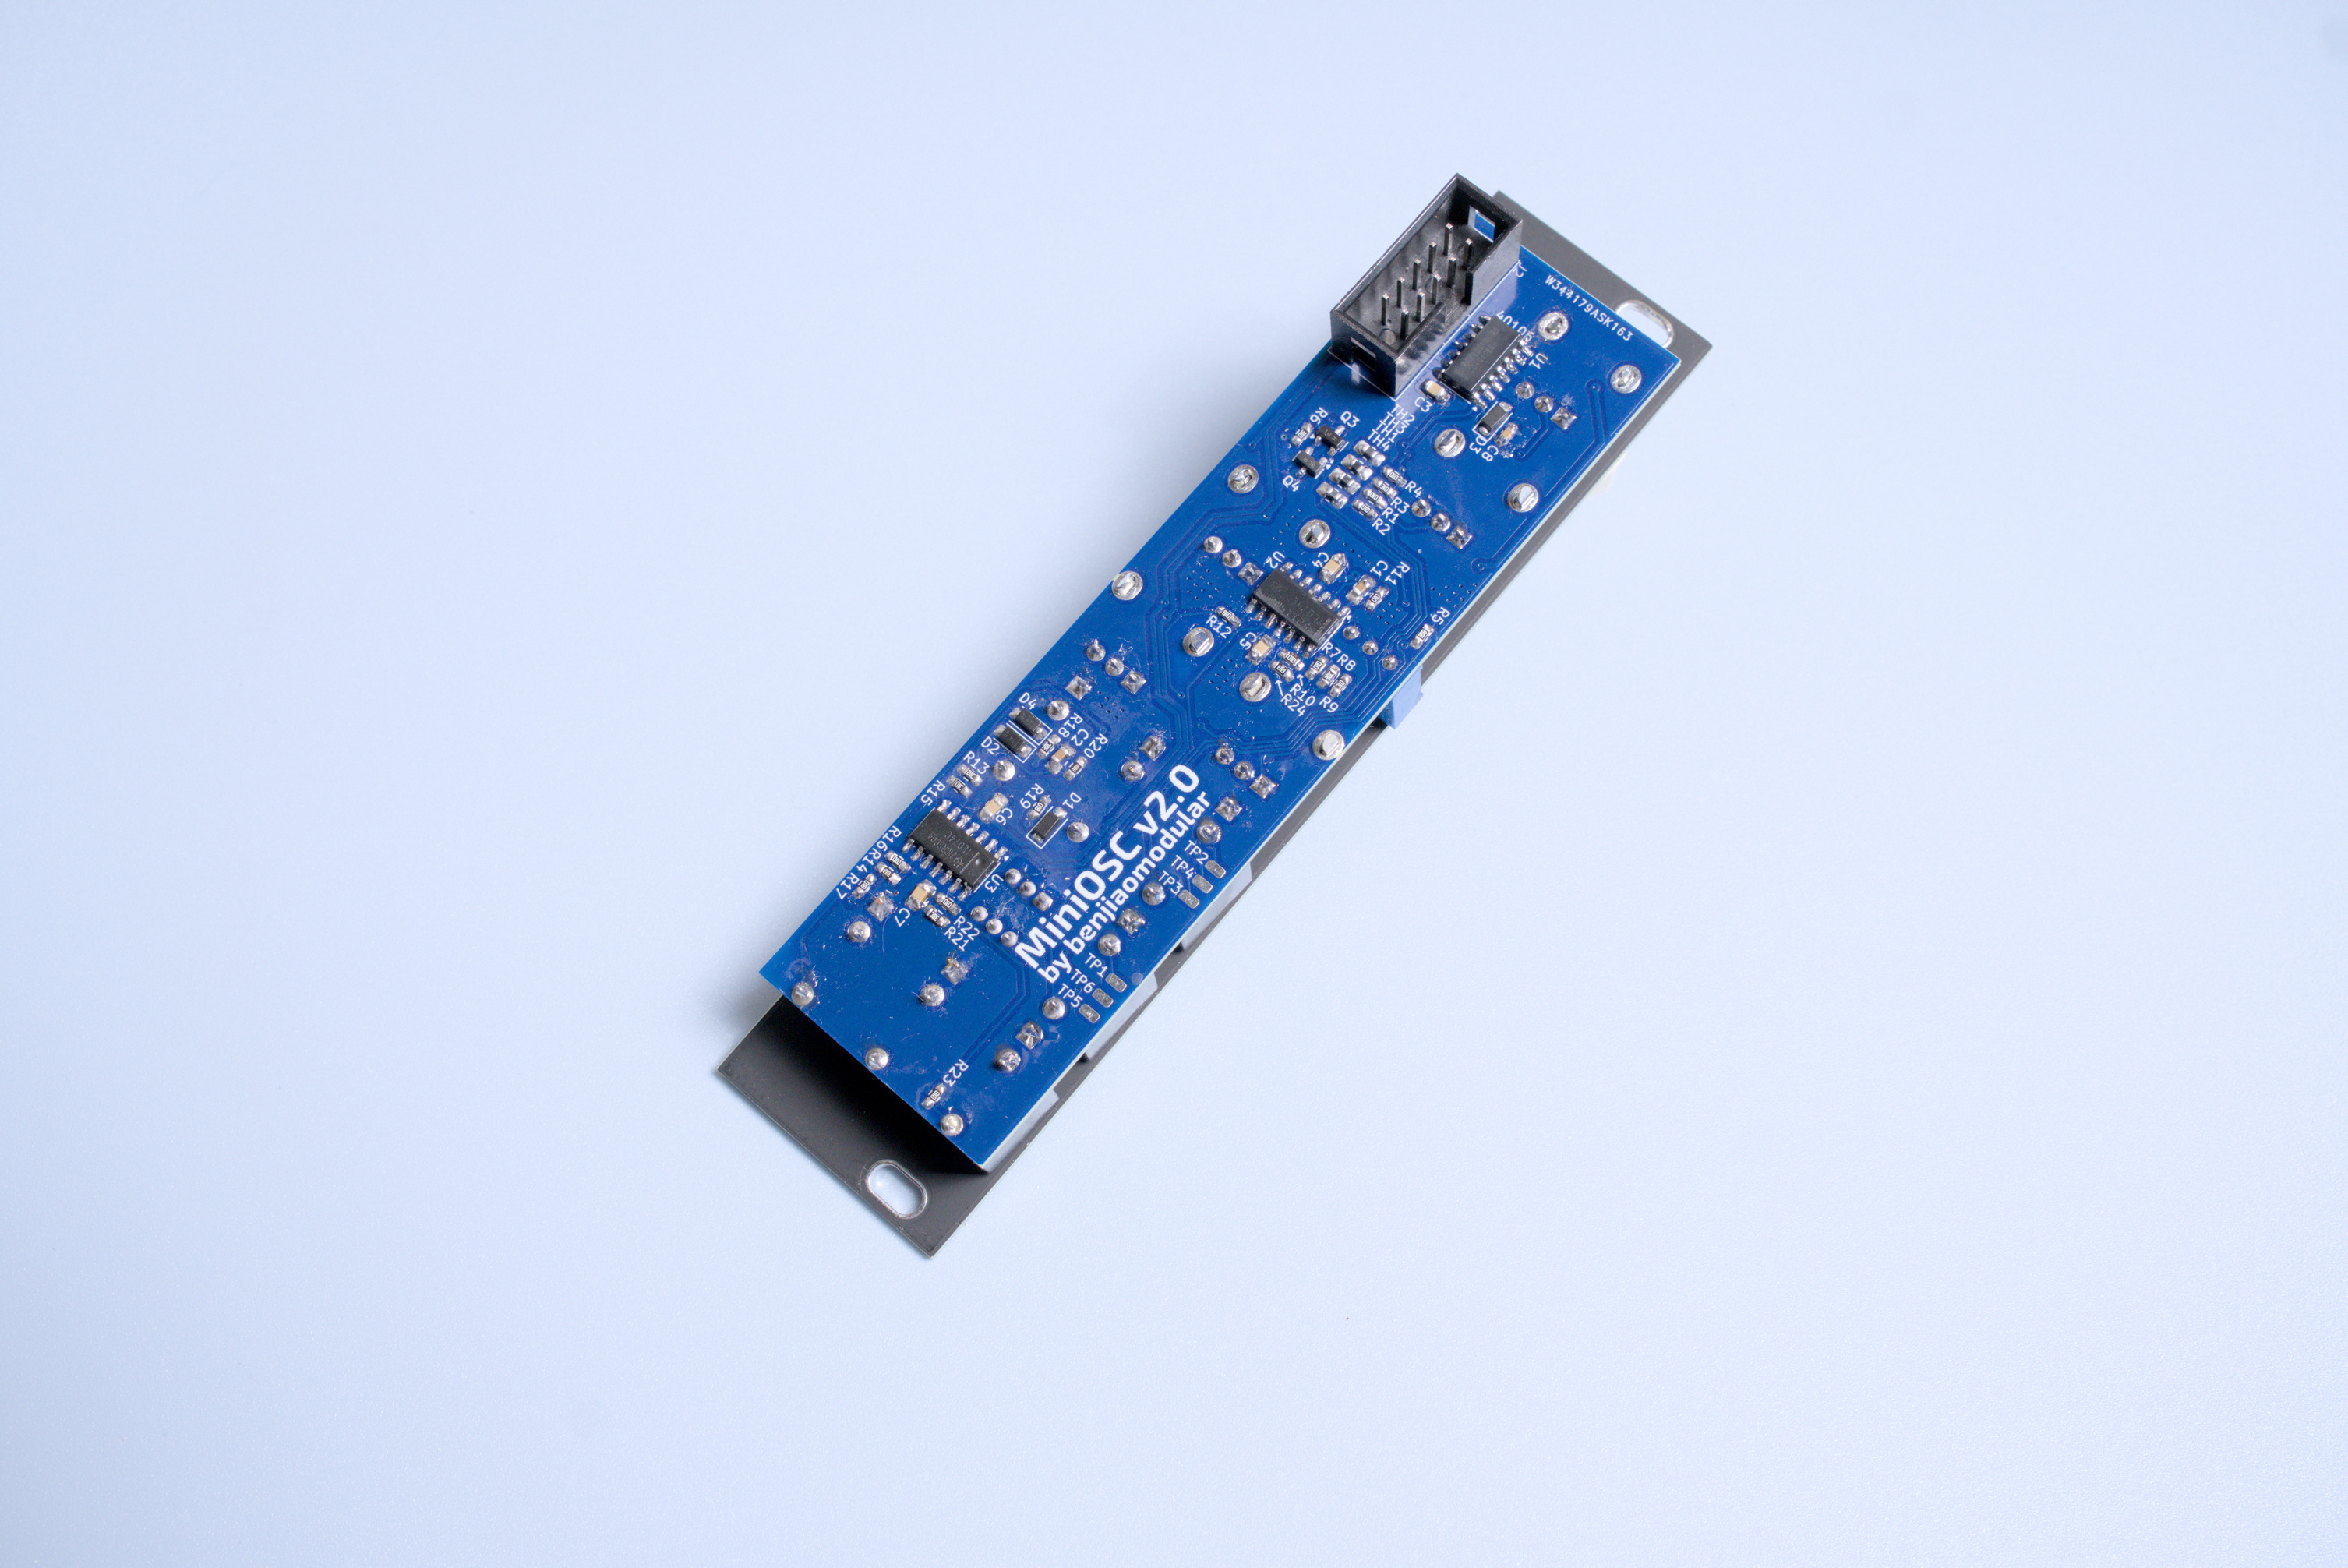
I redid the PCB with SMD parts. In fact, I’m in the process of remaking my all my old PCBs into SMT. It’s just easier to keep the layouts clean while keeping the modules small.
I understand that this might make them not so beginner-friendly, so I’m also planning to do a new line of through-hole modules with bigger panels in the future.
The Panel
I’ve been expermenting with more handwritten labels and panel art using a drawing tablet that I got for free.
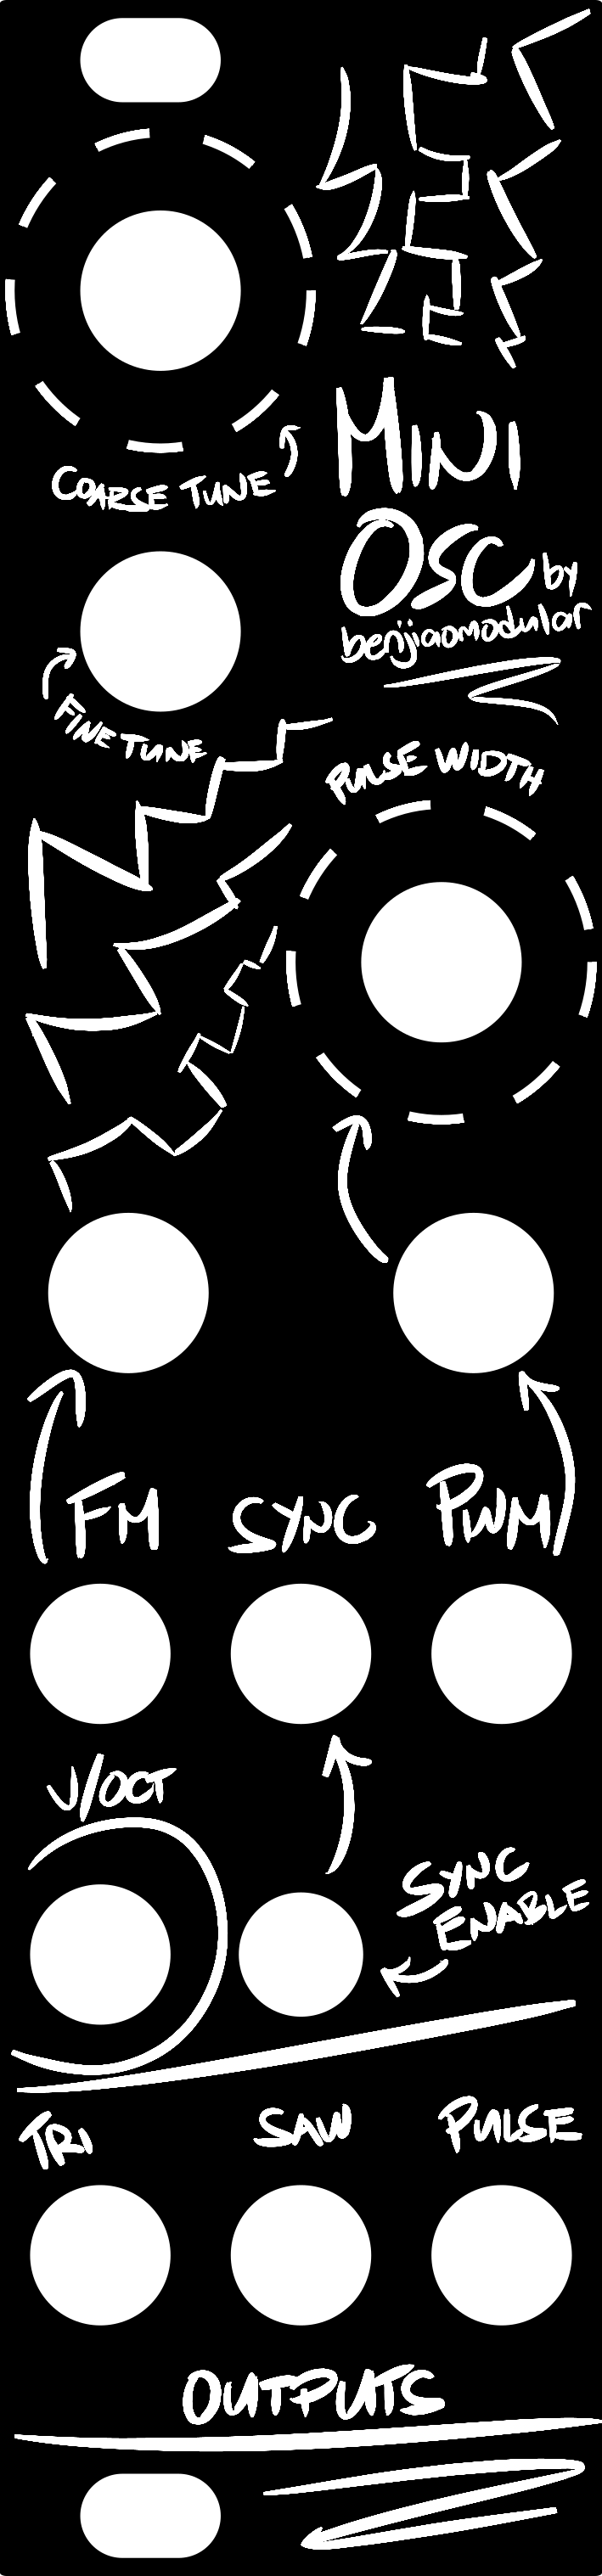
I did my drawing on Inkscape, exported it to PNG, and then imported the PNG into KiCAD through the Image Converter. I only had to Export it to Clipboard and then pasted it into my PCB Editor.

New Features
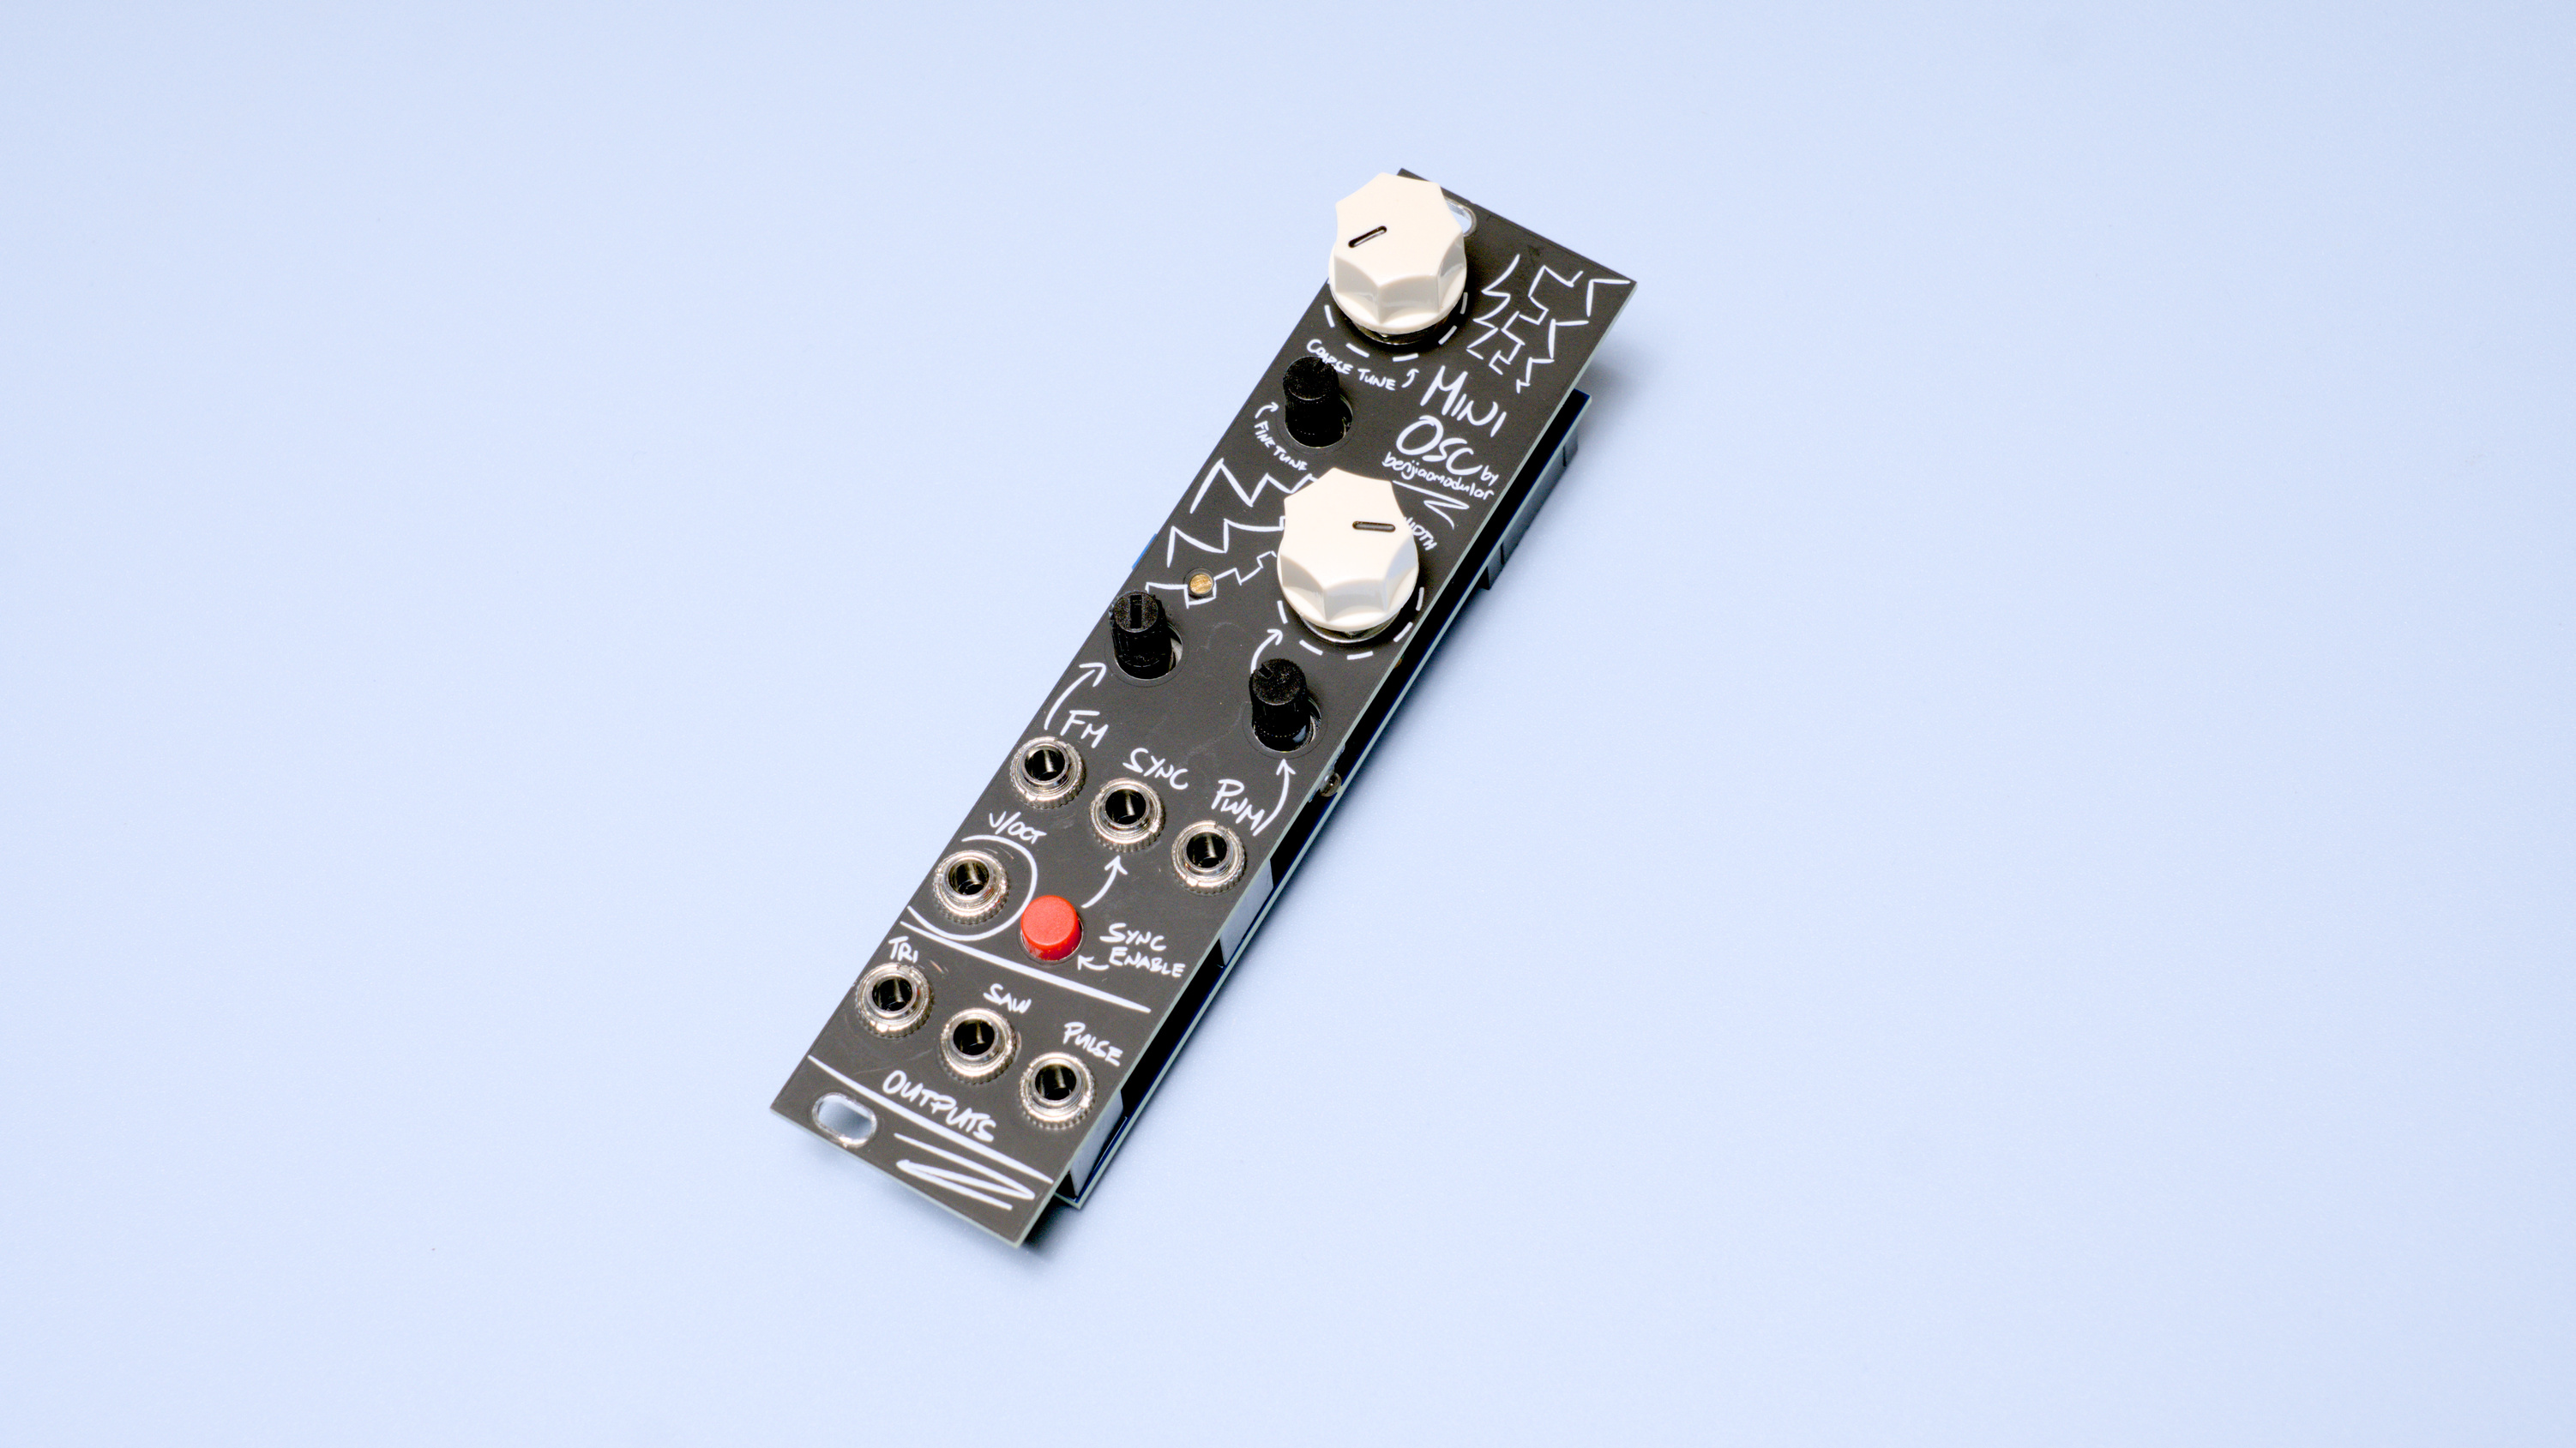
The first version of the MiniOSC had basic controls and I/O: Coarse and Fine Tuning knobs, FM CV, Pulse and Saw Wave Outputs.
With this new version, I decided to make some improvements. Testing out these mods was easy to do using 3D-printed panels and some deadbug wiring.

PWM CV and Triangle Wave Output
Pulse width on first version can only be controlled by a knob, which is pretty useless for my usual hands-off generative jams. This is why I felt the need to add a PWM CV input with an attenuator for better control.
I also needed something smoother sounding than saw and pulse waves so I added a triangle output.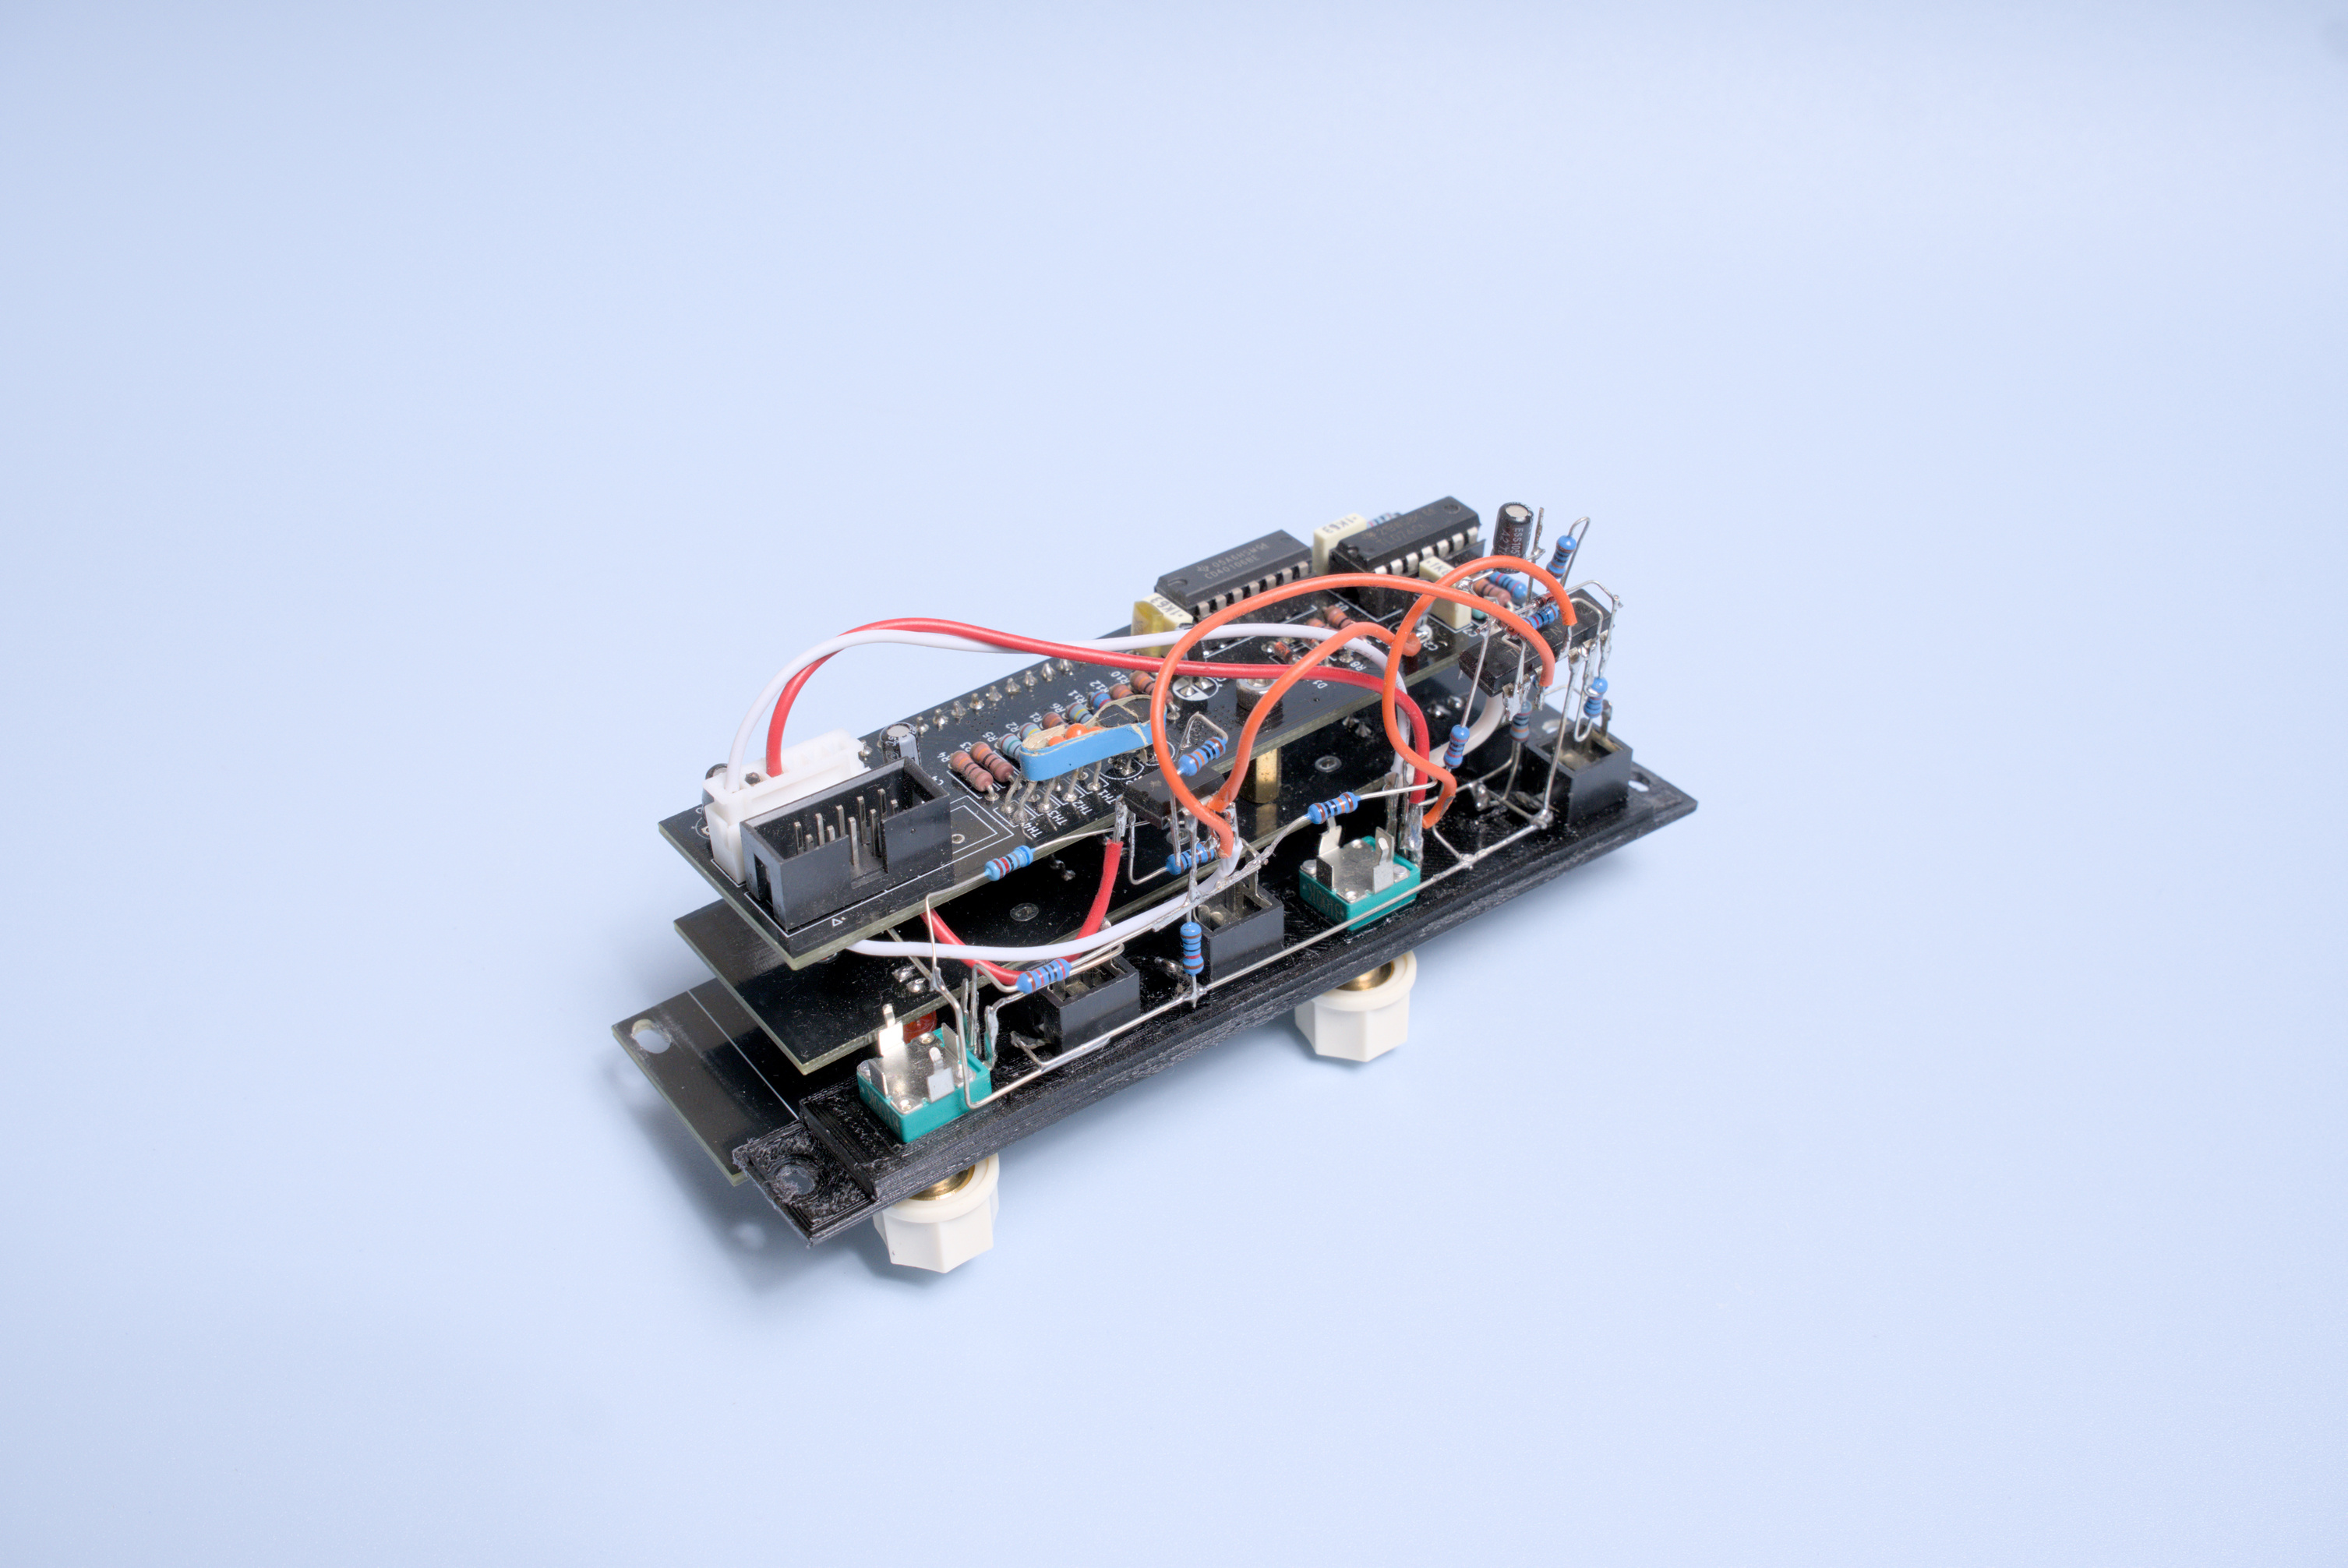
The upper half doesn’t always line up perfectly, but I don’t mind it.
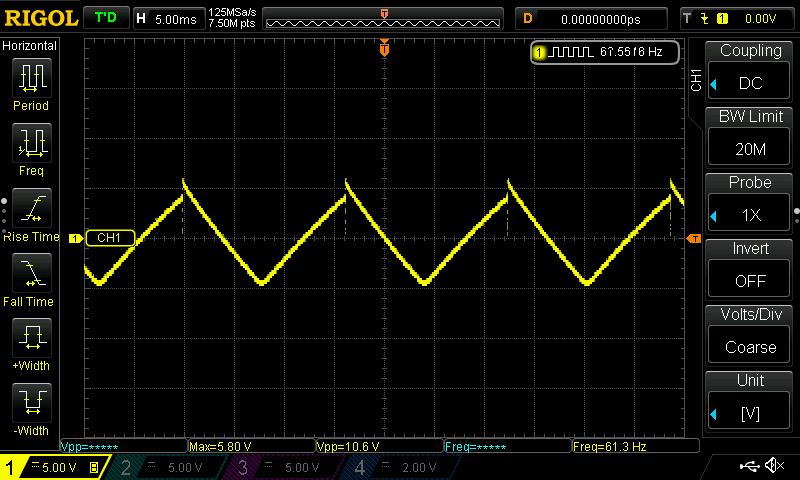
The Sync Input
This simple mod lets me hard sync one oscillator to another for further tone shaping. This works especially great with the triangle and saw output.
In the final version, it can be enabled using a latching button.

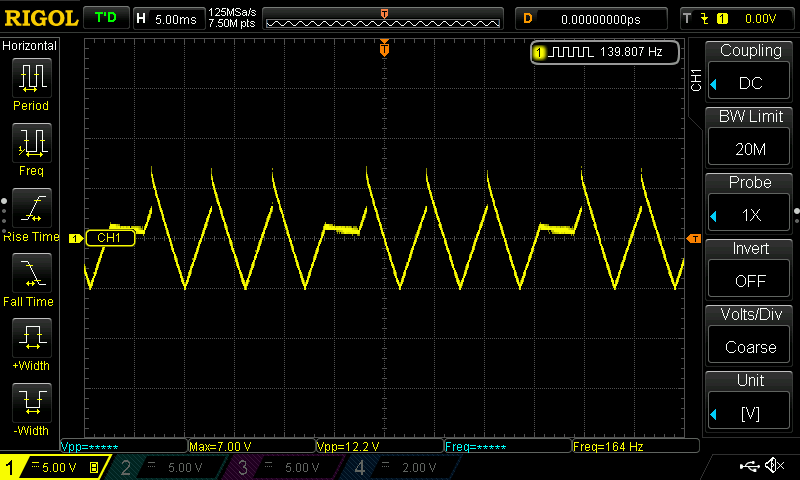
This can get LOUD. My tests can make it go to 20Vpp, so be careful.
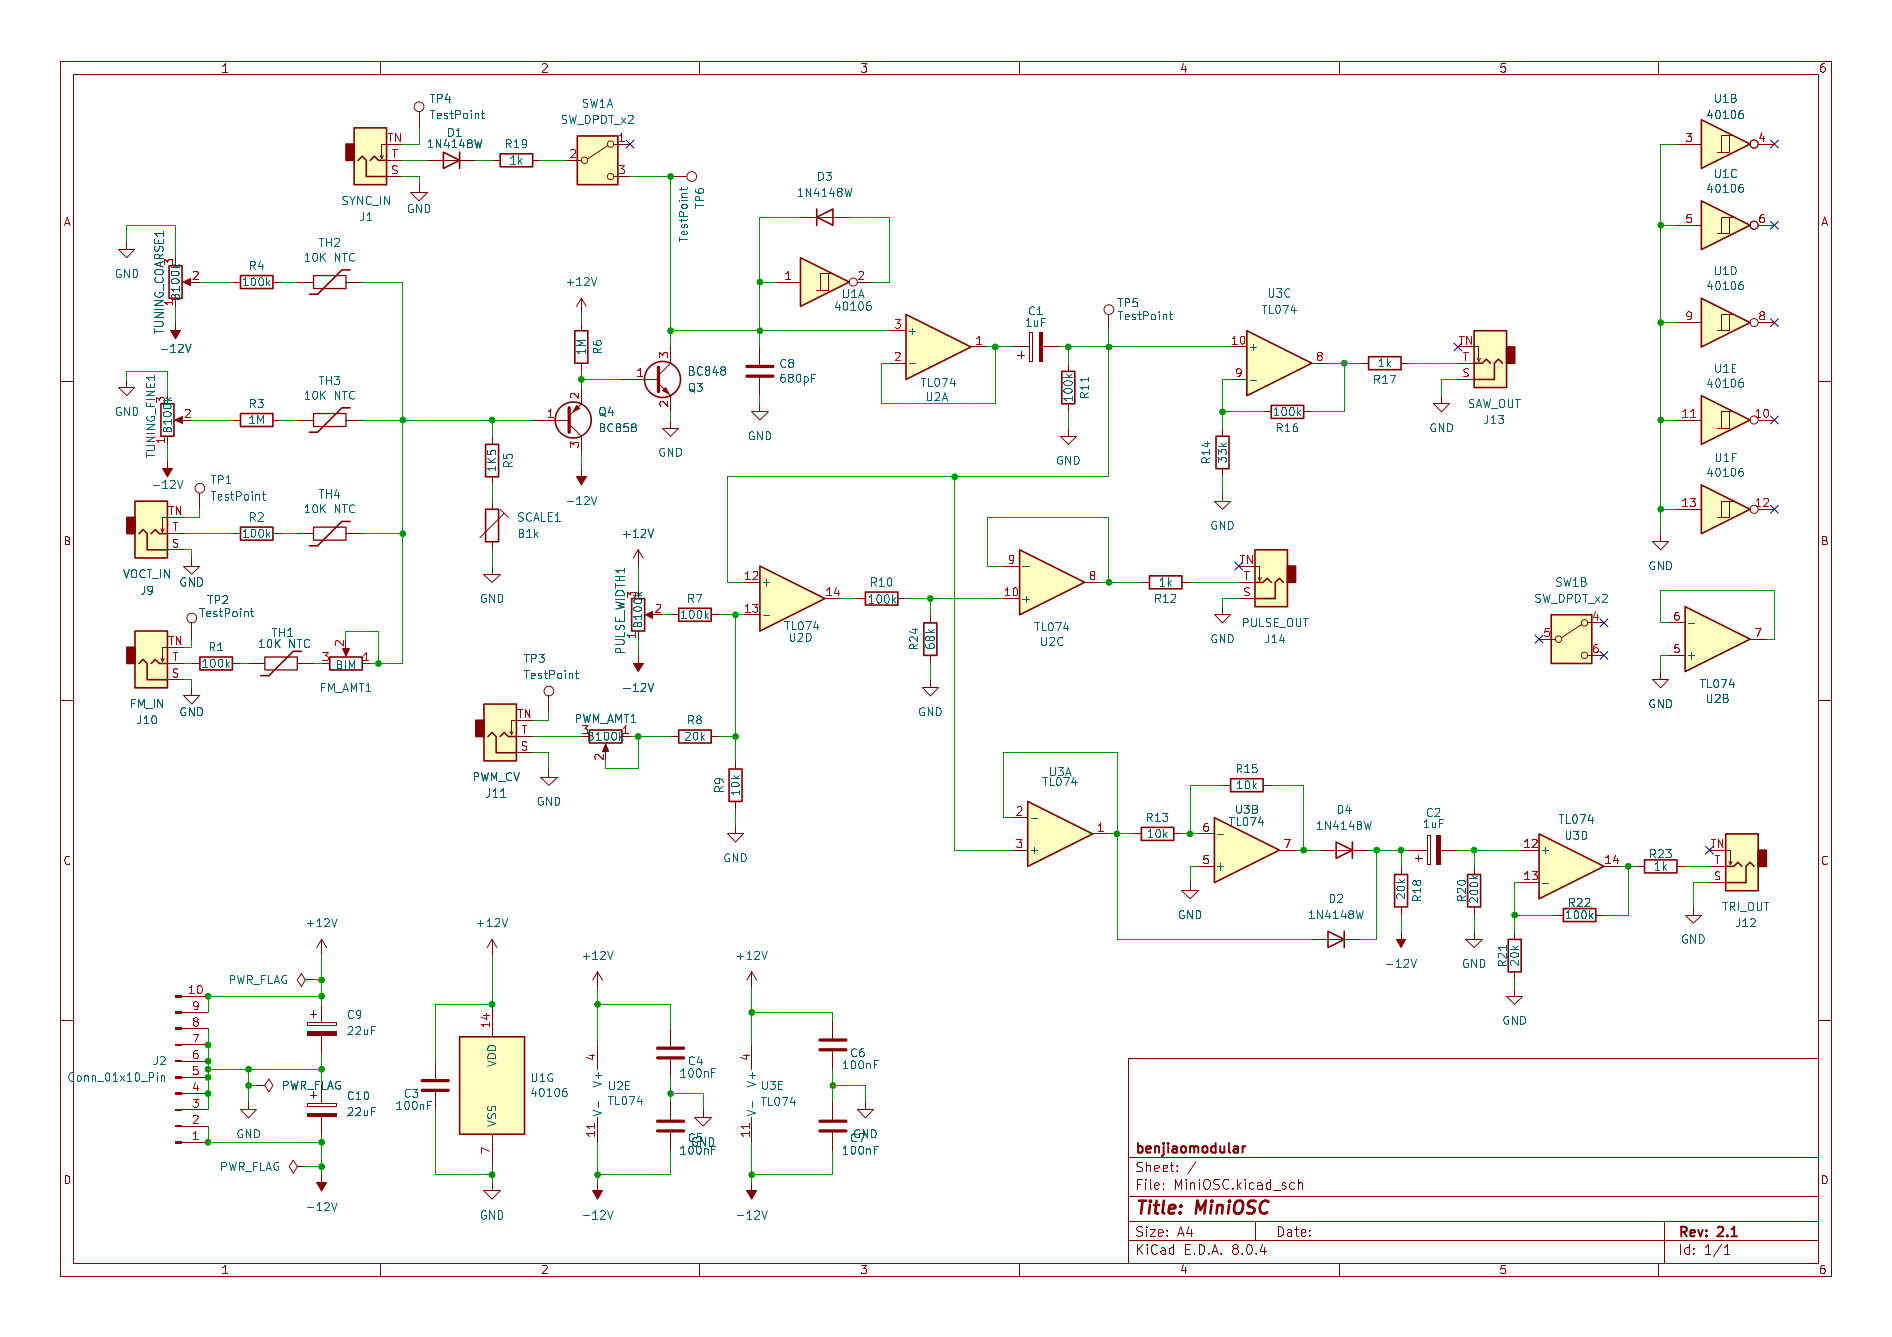
Schematic
This isn’t too different from the original MiniOSC. Because I was able to switch to SMT, I don’t have to deal with pin sockets anymore.
PCB
My PCBs for this module were sponsored by PCBWay. You can order PCBs for this module directly from PCBWay’s shared project page. You can even have it pre-assembled with all the SMT parts! Make sure to have both boards printed:
Of course, everything’s open-source, so you can download all my files and modify/print them as you please.
| Title | Filename |
|---|---|
| Gerber Files | MiniOSC v2.1 - Main.zip |
| MiniOSC v2.1 - Front.zip | |
| BOM | MiniOSC v2.1 - Bill of Materials |
Version Log
v2.1 - Fixed initial mistakes
- Resolved Pulse Width and PWM CV pot positions
- Fixed panel hole size for Sync Enable button
- Updated trimpot footprint from 3266Y to 3296w
- Updated value of R21 to 20k to lower amplitude of triangle output a little bit.
- Changed C8 from 2.2nF to 680pF. Moved the range for pitch a little bit higher.
- Switched filter caps C9 and C10 footprints to smaller 4mm size. Old ones were uneccessarily too big.
v2.0 - Moved to SMD
- Issue: Pulse Width and PWM CV pot positions were swapped
- Issue: Panel hole for the Sync Enable button was too tight
- Issue: Panel hole and footprint position for trim pot was off
More Build Notes
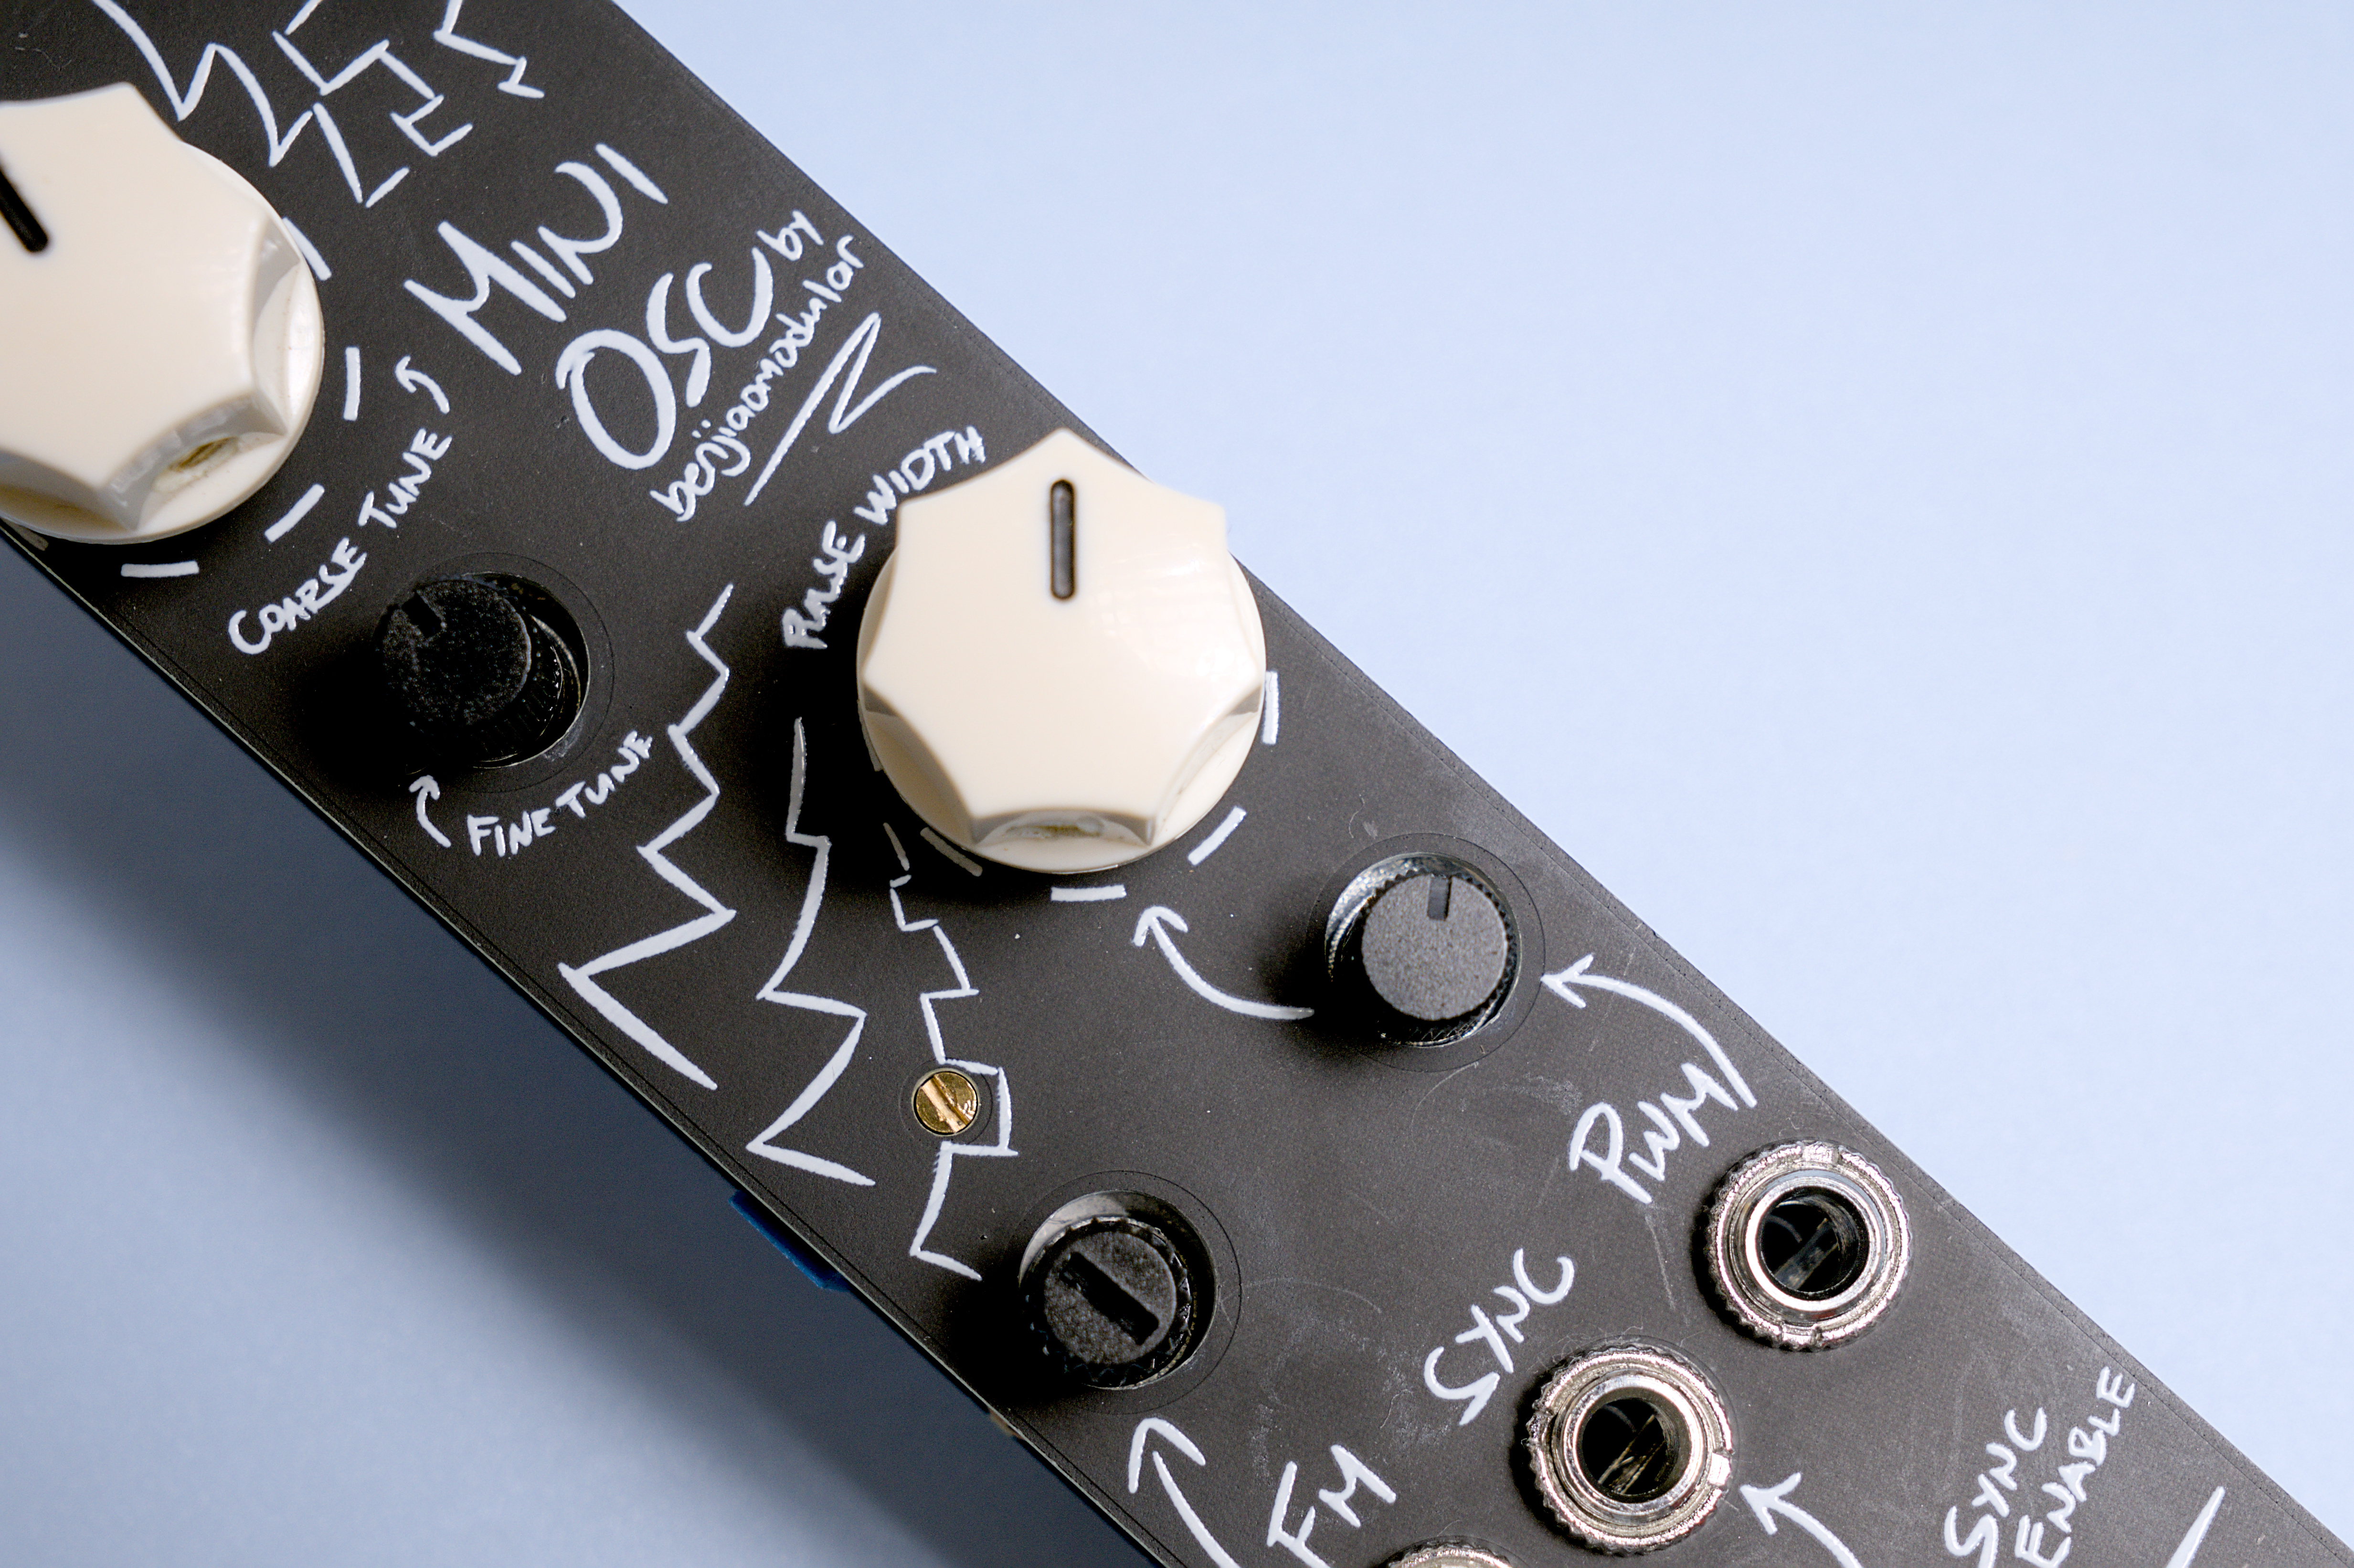
This build uses two different types of potentiometers. Coarse Tune and Pulse Width use solid shaft, panel mounted, pots that also hold the panel in place. I use KN1250 ABS Fluted 15x11mm knobs for most of my builds.

The Fine Tune, FM, and PWM controls use indicator pots that aren’t theaded. These are knurled and don’t need separate knobs attached to them.

Trim pots come in different sizes even though they might look similar. Make sure to get the 3296W type to be sure that it’ll fit.
The sync enable button uses a latching KFC7x7 switch. You’ll also need to buy a button cap for it. I used red because it looked good with the matte black panel.

I have links to all of the parts on the iBOM.
Conclusion
I’m satisified with how MiniOSC v2.1 turned out and I’ve been playing with it a lot. I’ve even built four of them for my own system already. I don’t think I’ll be updating this PCB anytime soon. I do have plans, however, of designing a more comples oscillator voice some time in the future.
You can check out my Instagram @benjiaomodular or YouTube for demos.
Let me know if you’ve built it! Also, if you’d like to support what I do, please consider donating through Ko-Fi.