euro2breadboard
Introduction
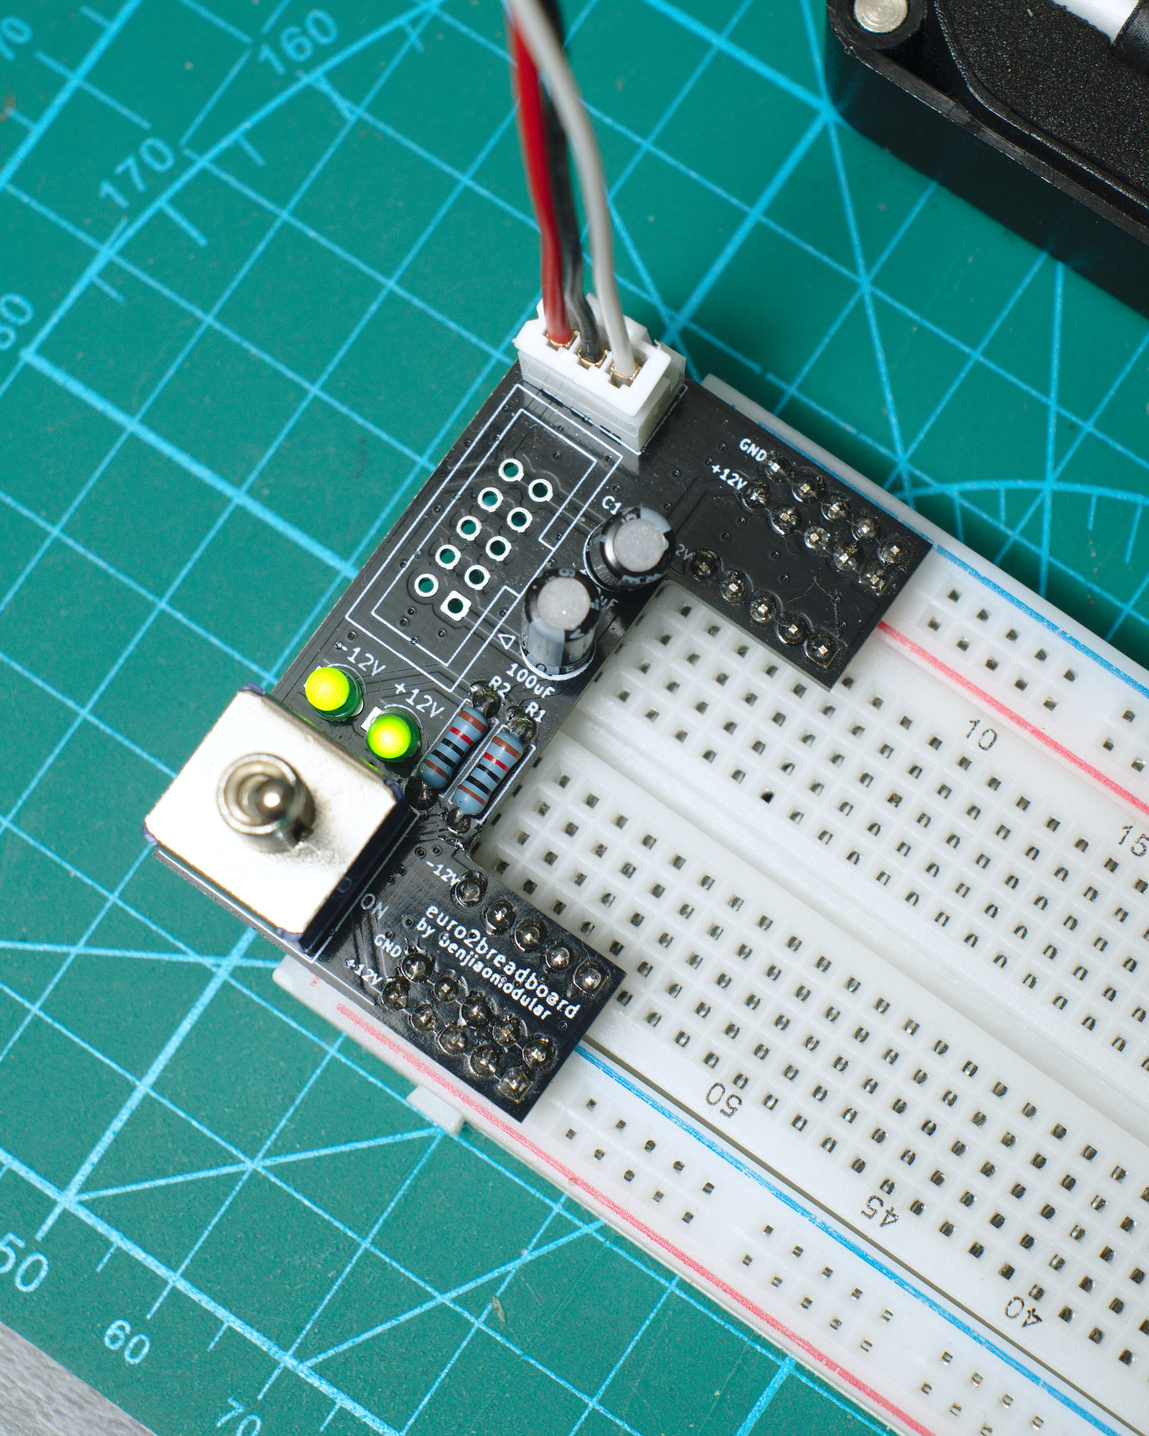
Took a short break from building synthesizer modules to design this simple utility PCB for breadboard prototyping.
It’ll let you connect standard Eurorack 10-pin IDC power supplies on to a breadboard. It also has an option to use JST XH2.56 3-pin connectors–which I use for my own personal builds.
Build
Bill of materials
| # | Value | Type | Part # |
|---|---|---|---|
| 2 | 100uF | Capacitor | |
| 2 | 10k | Resistor | |
| 2 | 02x05 Male | Pin Connectors | |
| 2 | 01x05 Male | Pin Connectors | |
| 2 | 3mm | LED | |
| 1 | JST-XH 1x03 | Socket Connector | |
| 1 | IDC 2x05 | Socket Connector | |
| 1 | Toggle Switch | On-On DPDT | MTS-202 |
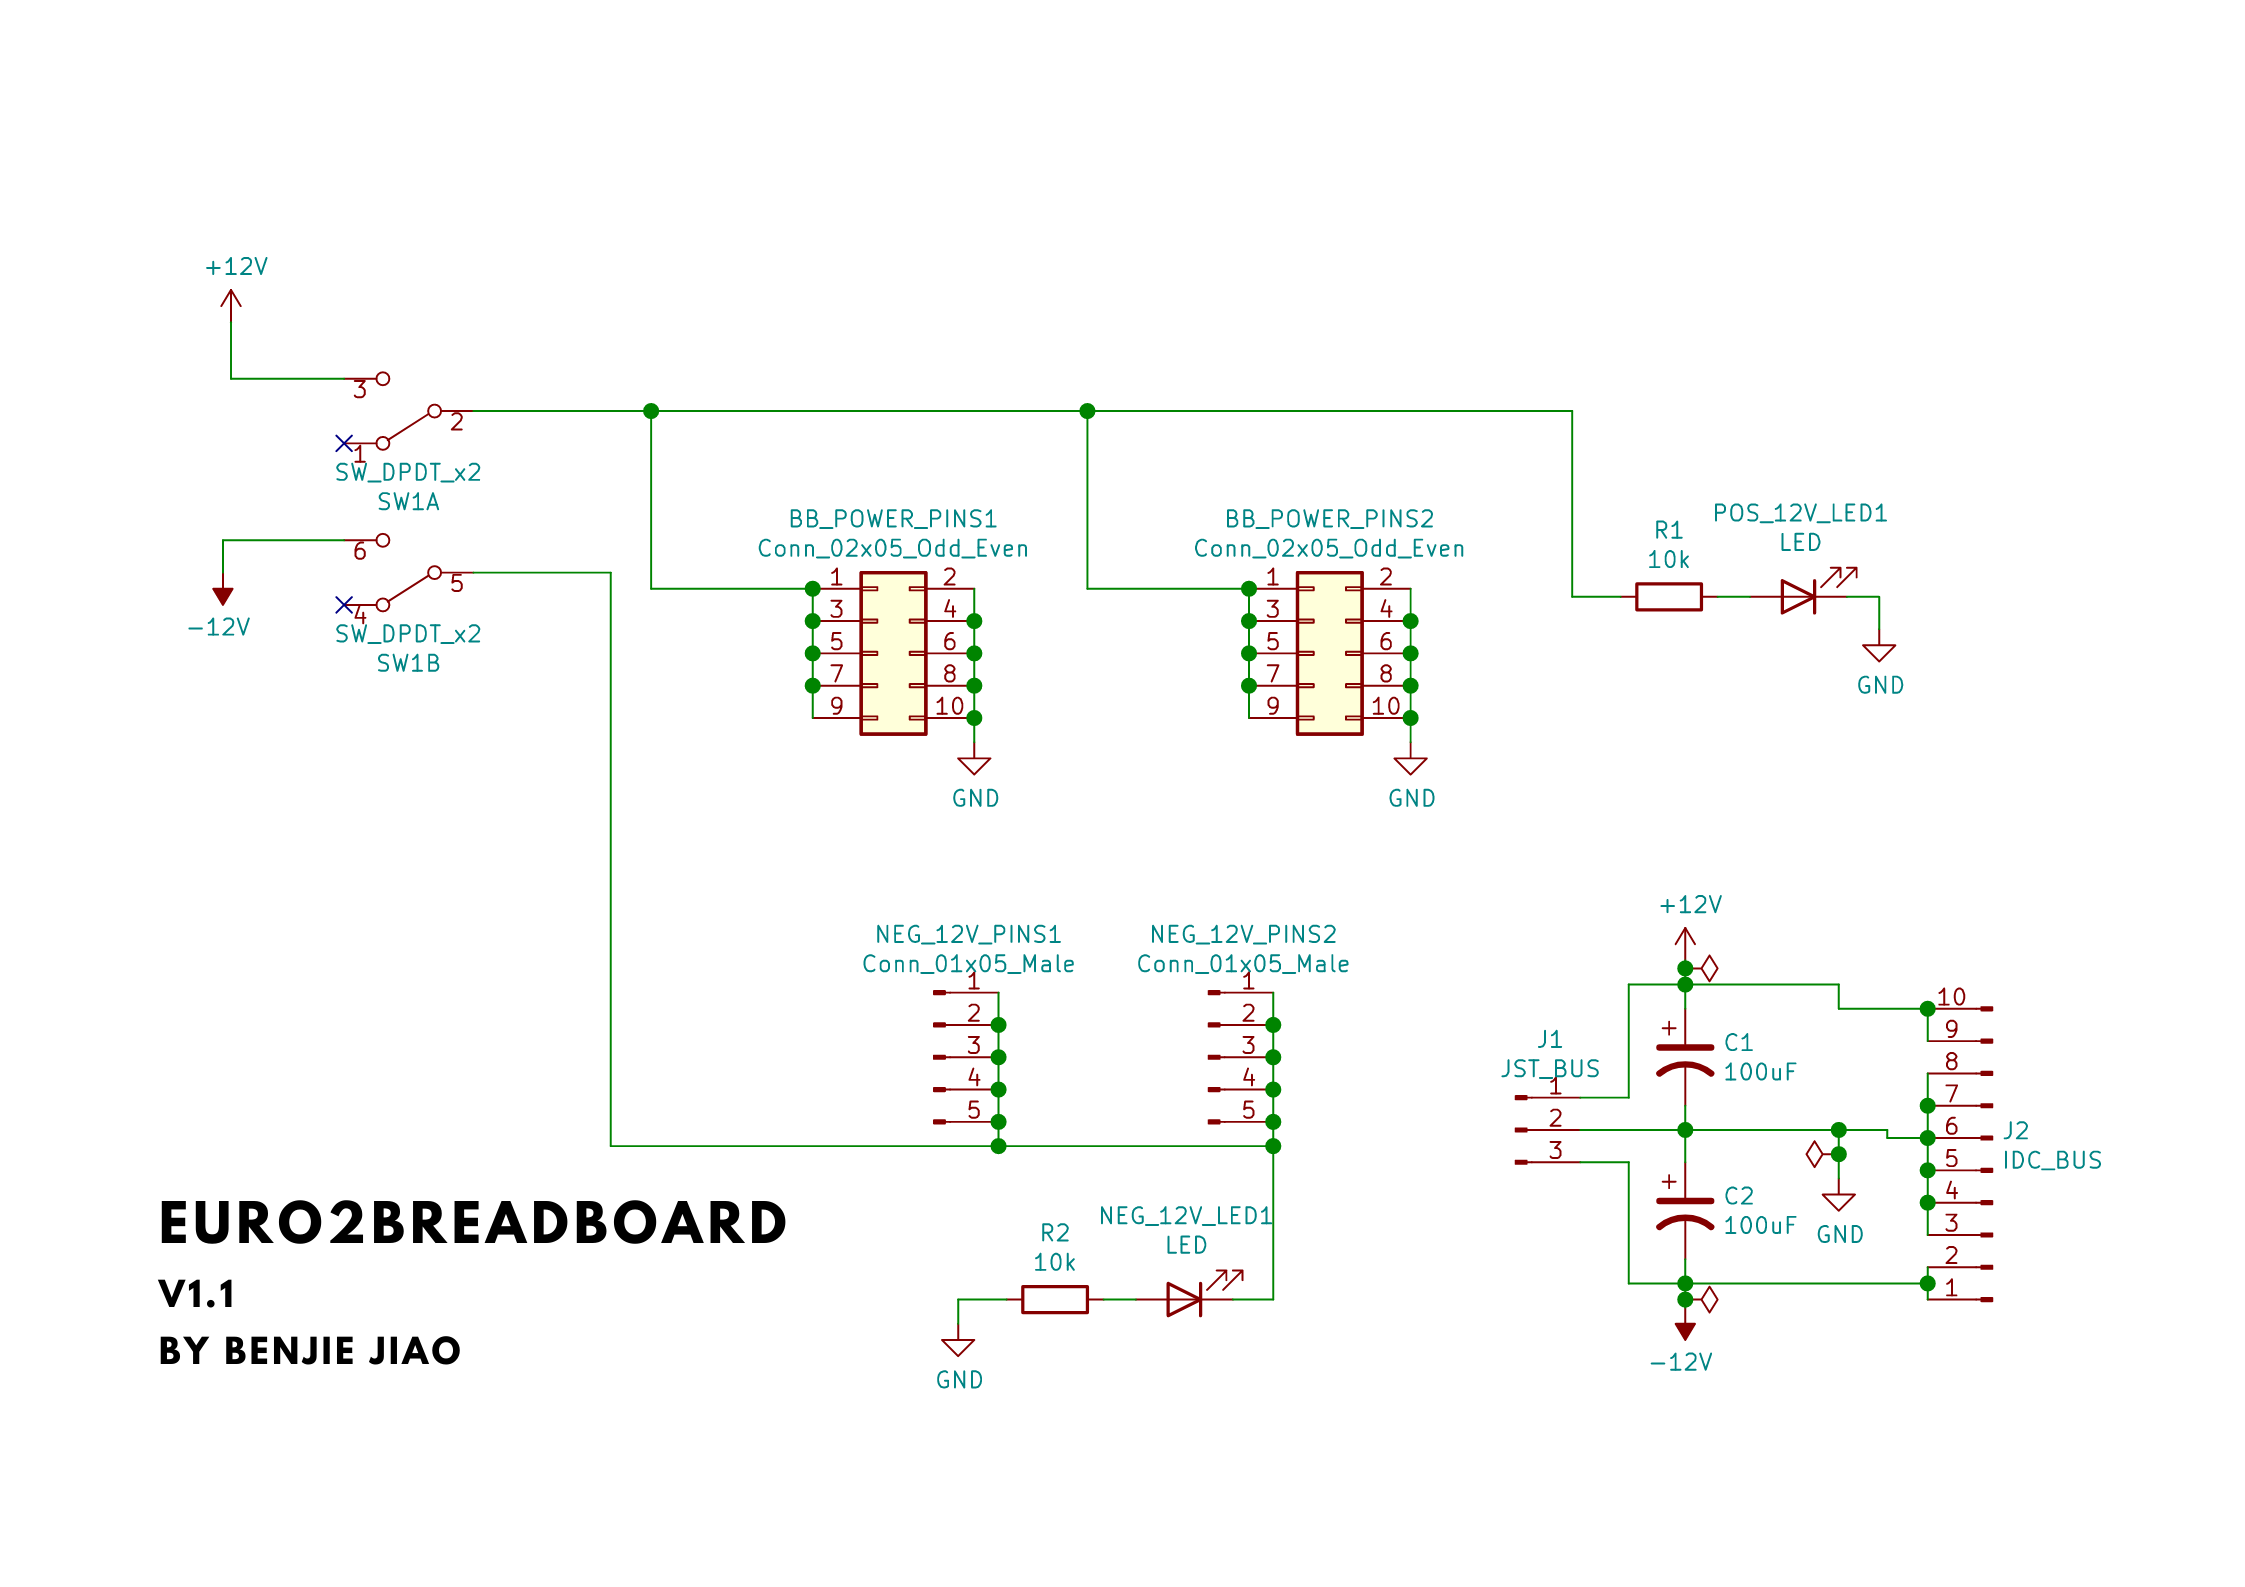
Schematics
The circuit is composed of an on/off switch, indicator LEDs for positive and negative rails, some bulk capacitors, 2.54 spaced pin connectors, and power connector sockets.
For the power conector socket, you may chose between a JST XH2.54 connector and standard eurorack 10-pin IDC connector sockets.
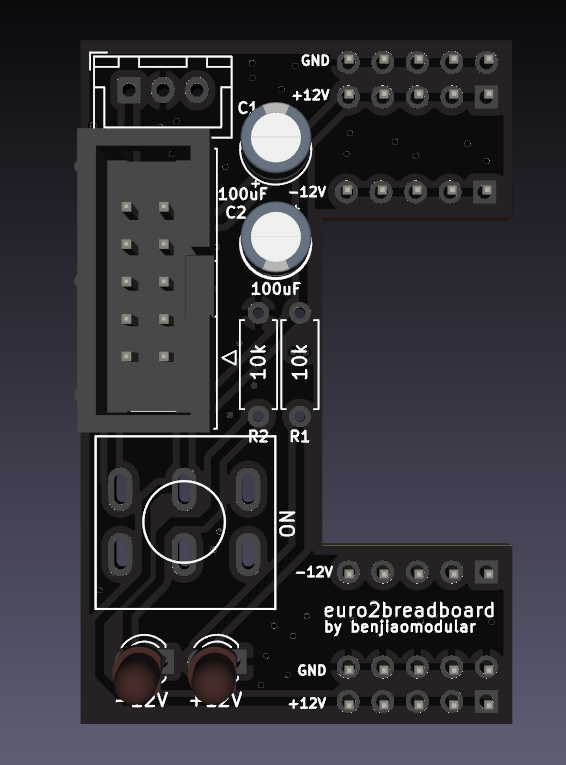
PCB
PCB shops use Gerber files for etching copper traces, printing lables, drilling holes, and other manufacturing details. You can download my zipped files for a version you like and upload those into their website.
My PCBs in the MiniSynth series were sponsored by PCBWay – a great option for prototyping. Use their Quick-order PCB tool to get an instant quote on the files.
You can also go to the PCBWay community page to order the PCBs directly from them: euro2breadboard v1.1
Versions
v1.1 - Quick fixes (Unverified)
This version fixes issues found in the initial release.
- Fixed spacing for pins.
- Updated footprint for toggle switch to have more allowance on the pin size.
- Swapped position of the toggle switch and the indicator LEDs so the user can have a better view of the LED.
| Title | Filename |
|---|---|
| Schematics | euro2breadboard 1.1.pdf |
| Gerber Files | euro2breadboard 1.1.zip |
v1.0 - Initial release
This is the first release of the module.
- Issue: Pin spacing a bit off from standard breadboard spacing.
- Issue: Holes for the toggle switch pins were too tight.
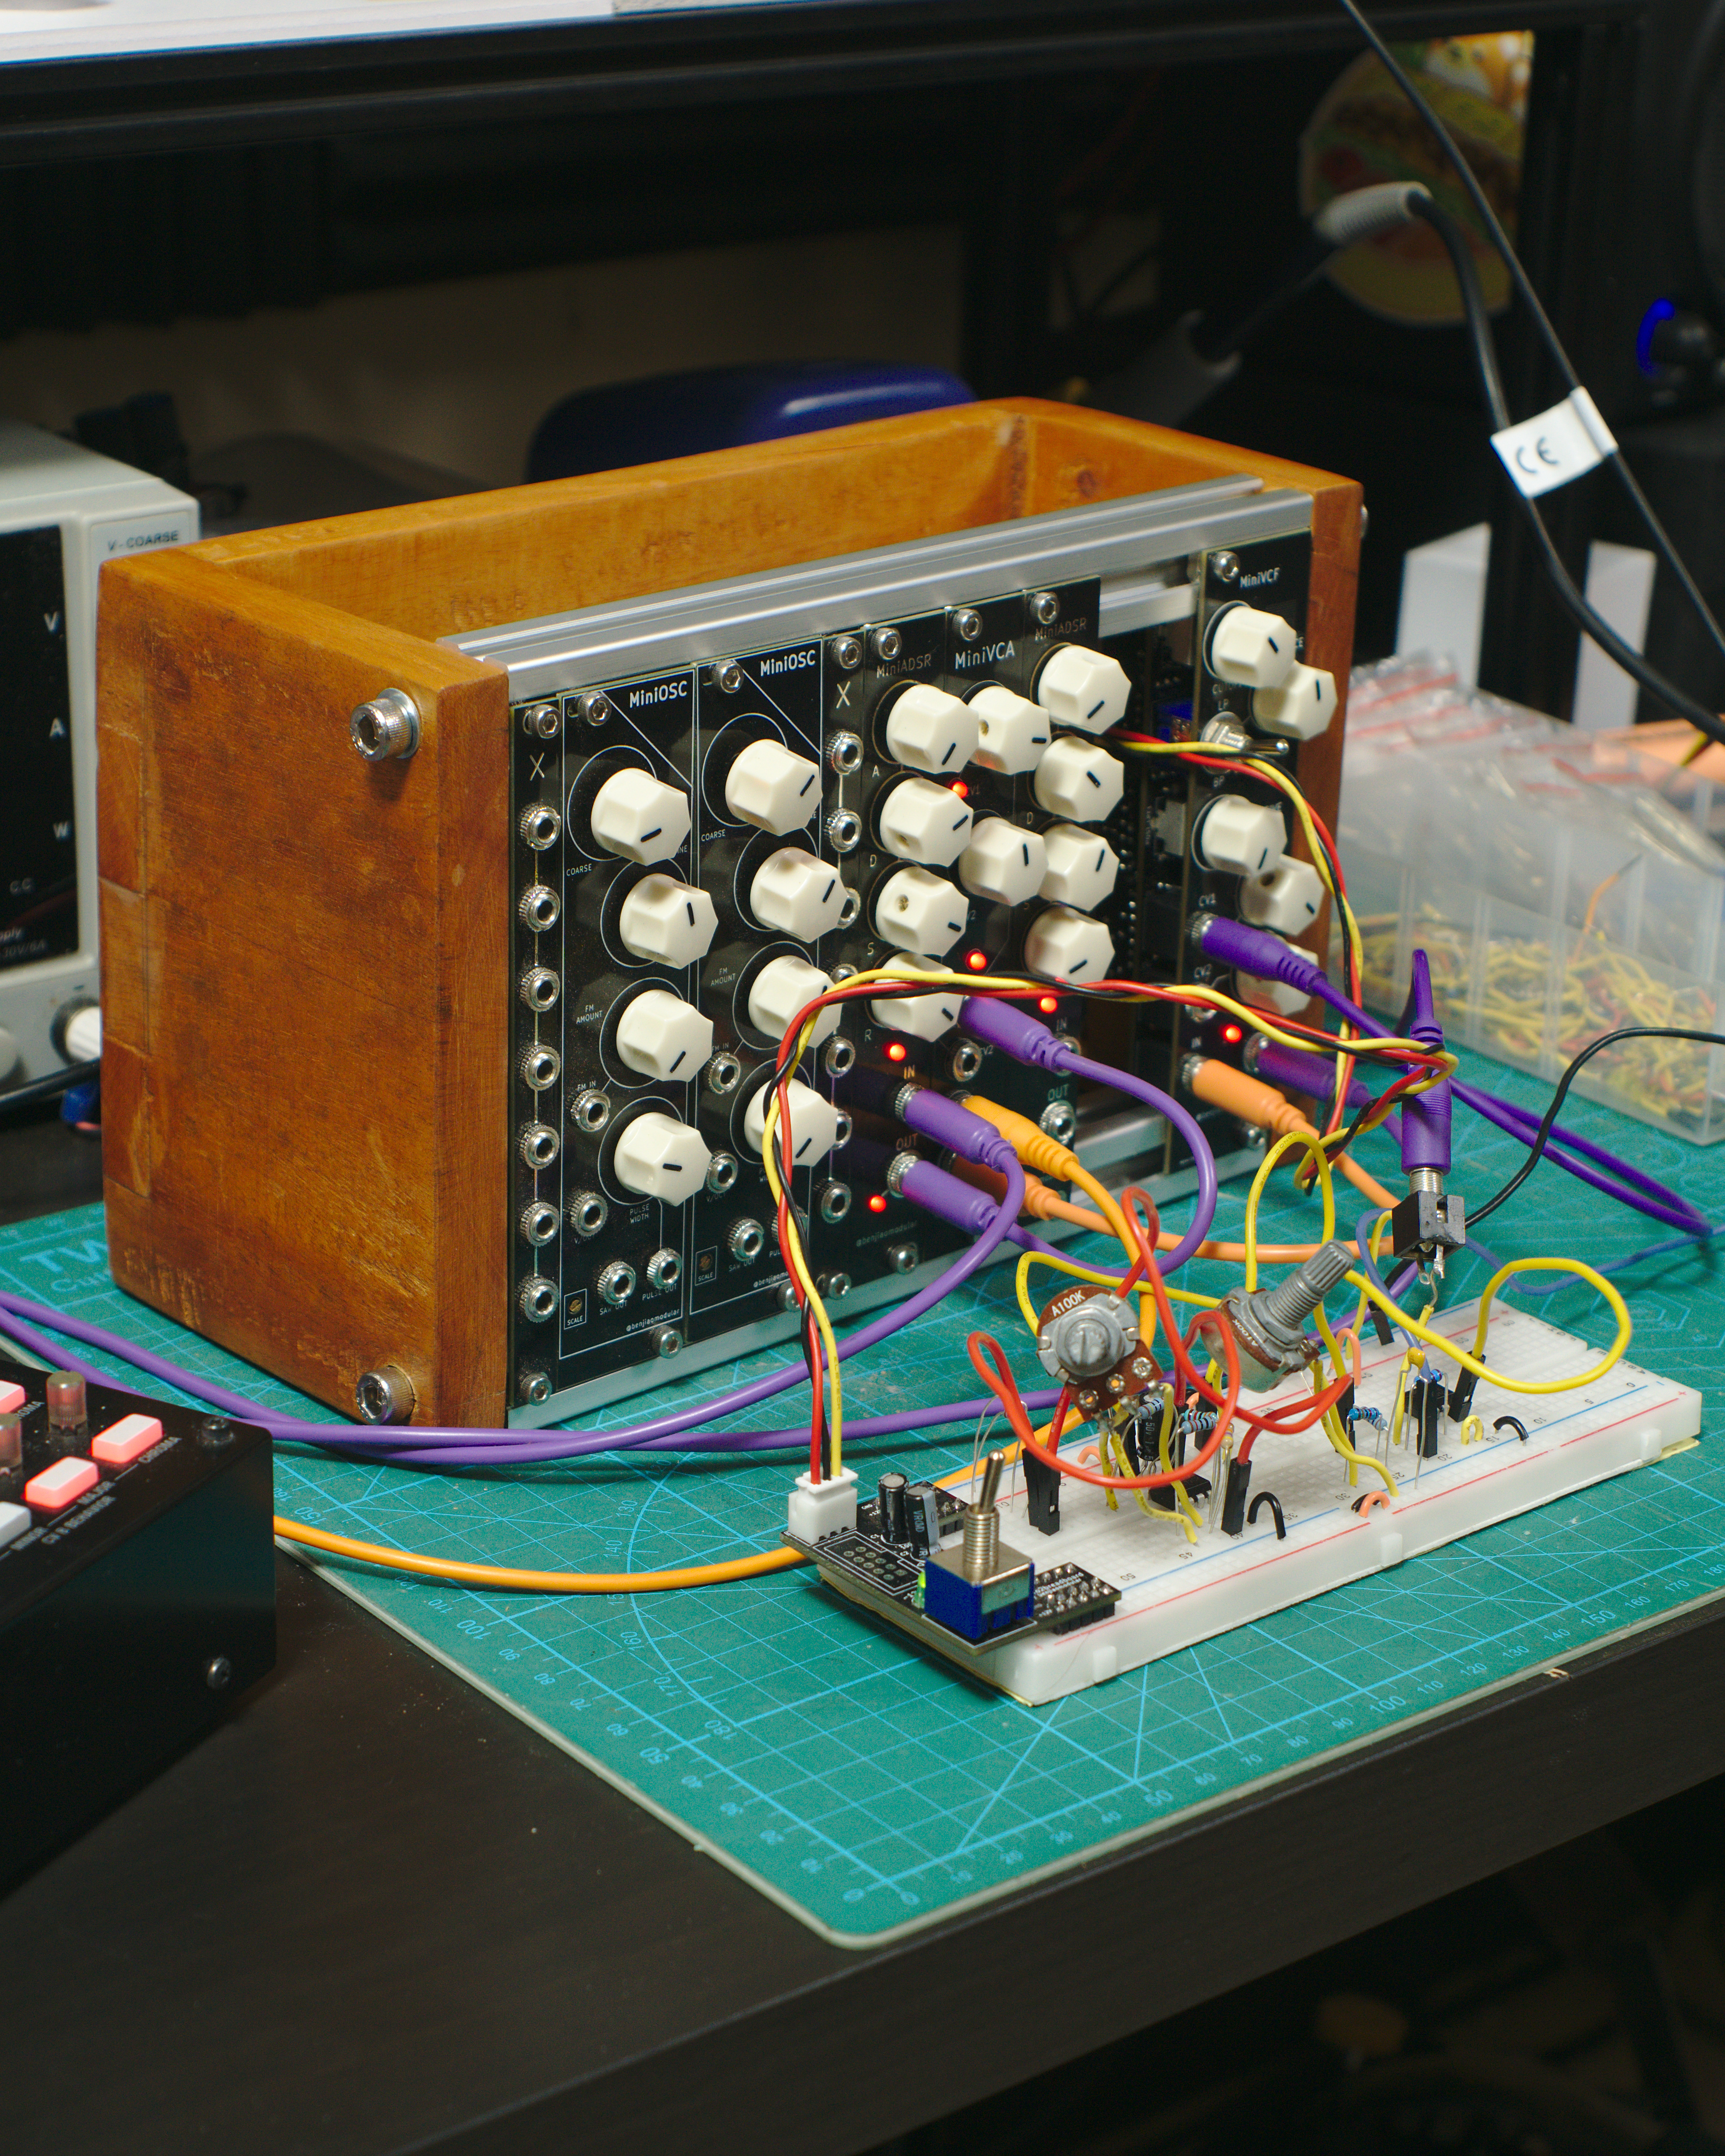
Demos
Watch me build and talk about this on Youtube:
Conclusion
This module has definitely saved me some space on my workbench. The toggle switch also means that I don’t have to unplug and wear down some wires when troubleshooting.
Let me know if you’ve built it! Tag me on IG @benjiaomodular.