MiniADSR
Introduction
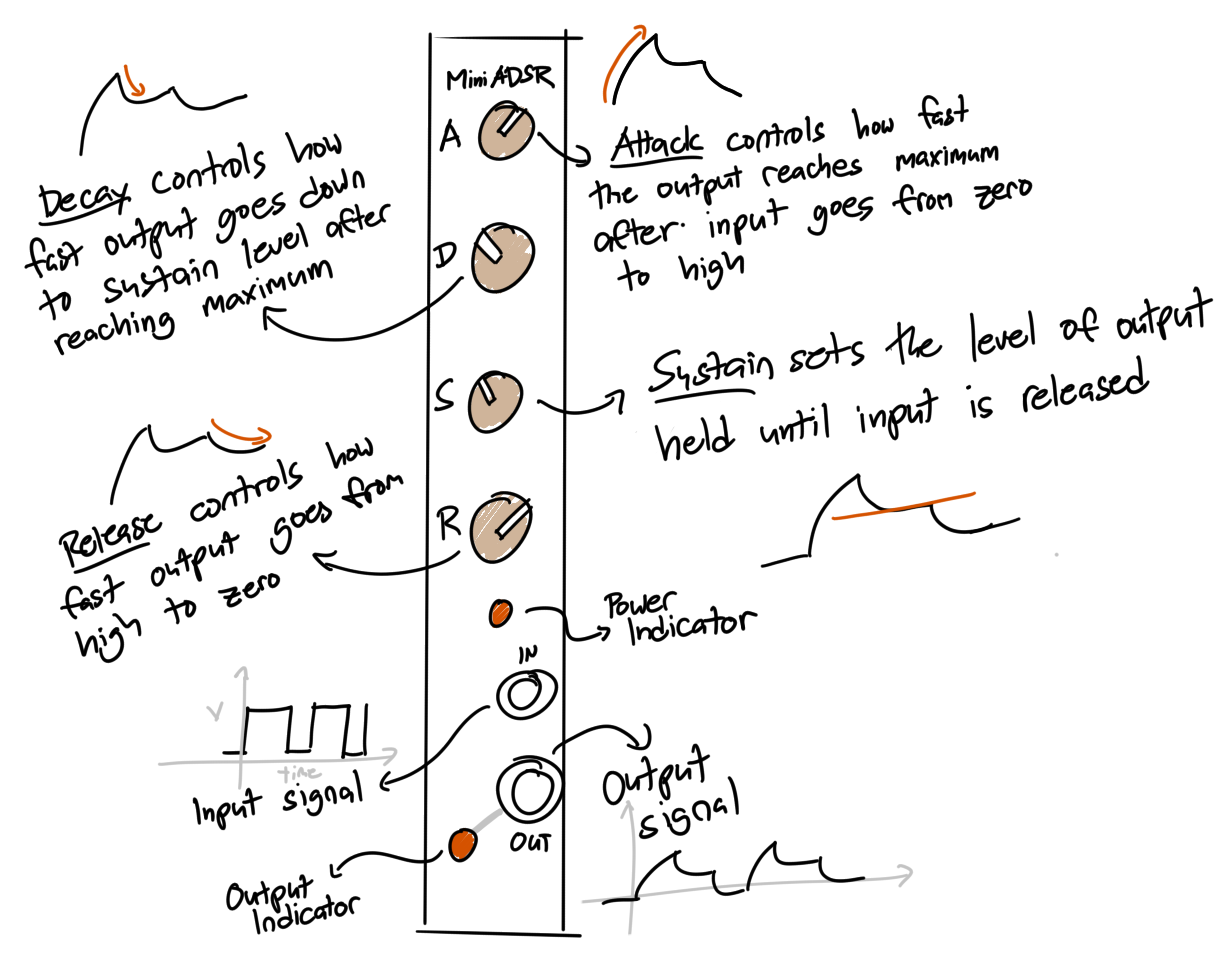
This is my take on René Schmitz’ Fastest Envelope in the West. It’s a four parameter envelope generator. Attack, decay, and release times can range from 200ms to 16s.

The final build is in a standard 4HP Eurorack panel.
Build
Bill of Materials
Applicable for v1.0.1 PCB. Here’s a list of what I used. All resistors are 1/4W, electrolytics are 5mm diameter at most, box type caps are 5.00mm pitch.
Passives
- 1 x 10nF capacitor
- 1 x 10uF capacitor
- 1 x 1uF capacitor (can also be substituted with values from 470nF to 4.7uF)
- 2 x 100uF capacitor
- 2 x 100nF capacitor
- 4 x 10k resistor
- 4 x 4.7k resistor
- 1 x 22k resistor
- 3 x 100r resistor
- 5 x 1N4148 diode
- 2 x 3mm LEDs (i used red)
Transistors and ICs
- 3 x BC547 transistor
- 1 x LM555 timer IC
- 1 x TL072 operational amplifier
Hardware
- 3 x 1M potentiometer (RV09AF-40-20K-B1M)
- 1 x 10K potentiometer (RV09AF-40-20K-B10K)
- 2 x 3.5mm audio jack
- 1 x 1x14 2.54mm pin headers
- 1 x 1x14 2.54mm pin sockets
- 1 x 12mm hex standoff
- 1 x M3 nut
- 1 x 5mm M3 screw
Schematics
Version 1.0.x has the bare minimum controls for an ADSR. Four knobs, one input, and one output.
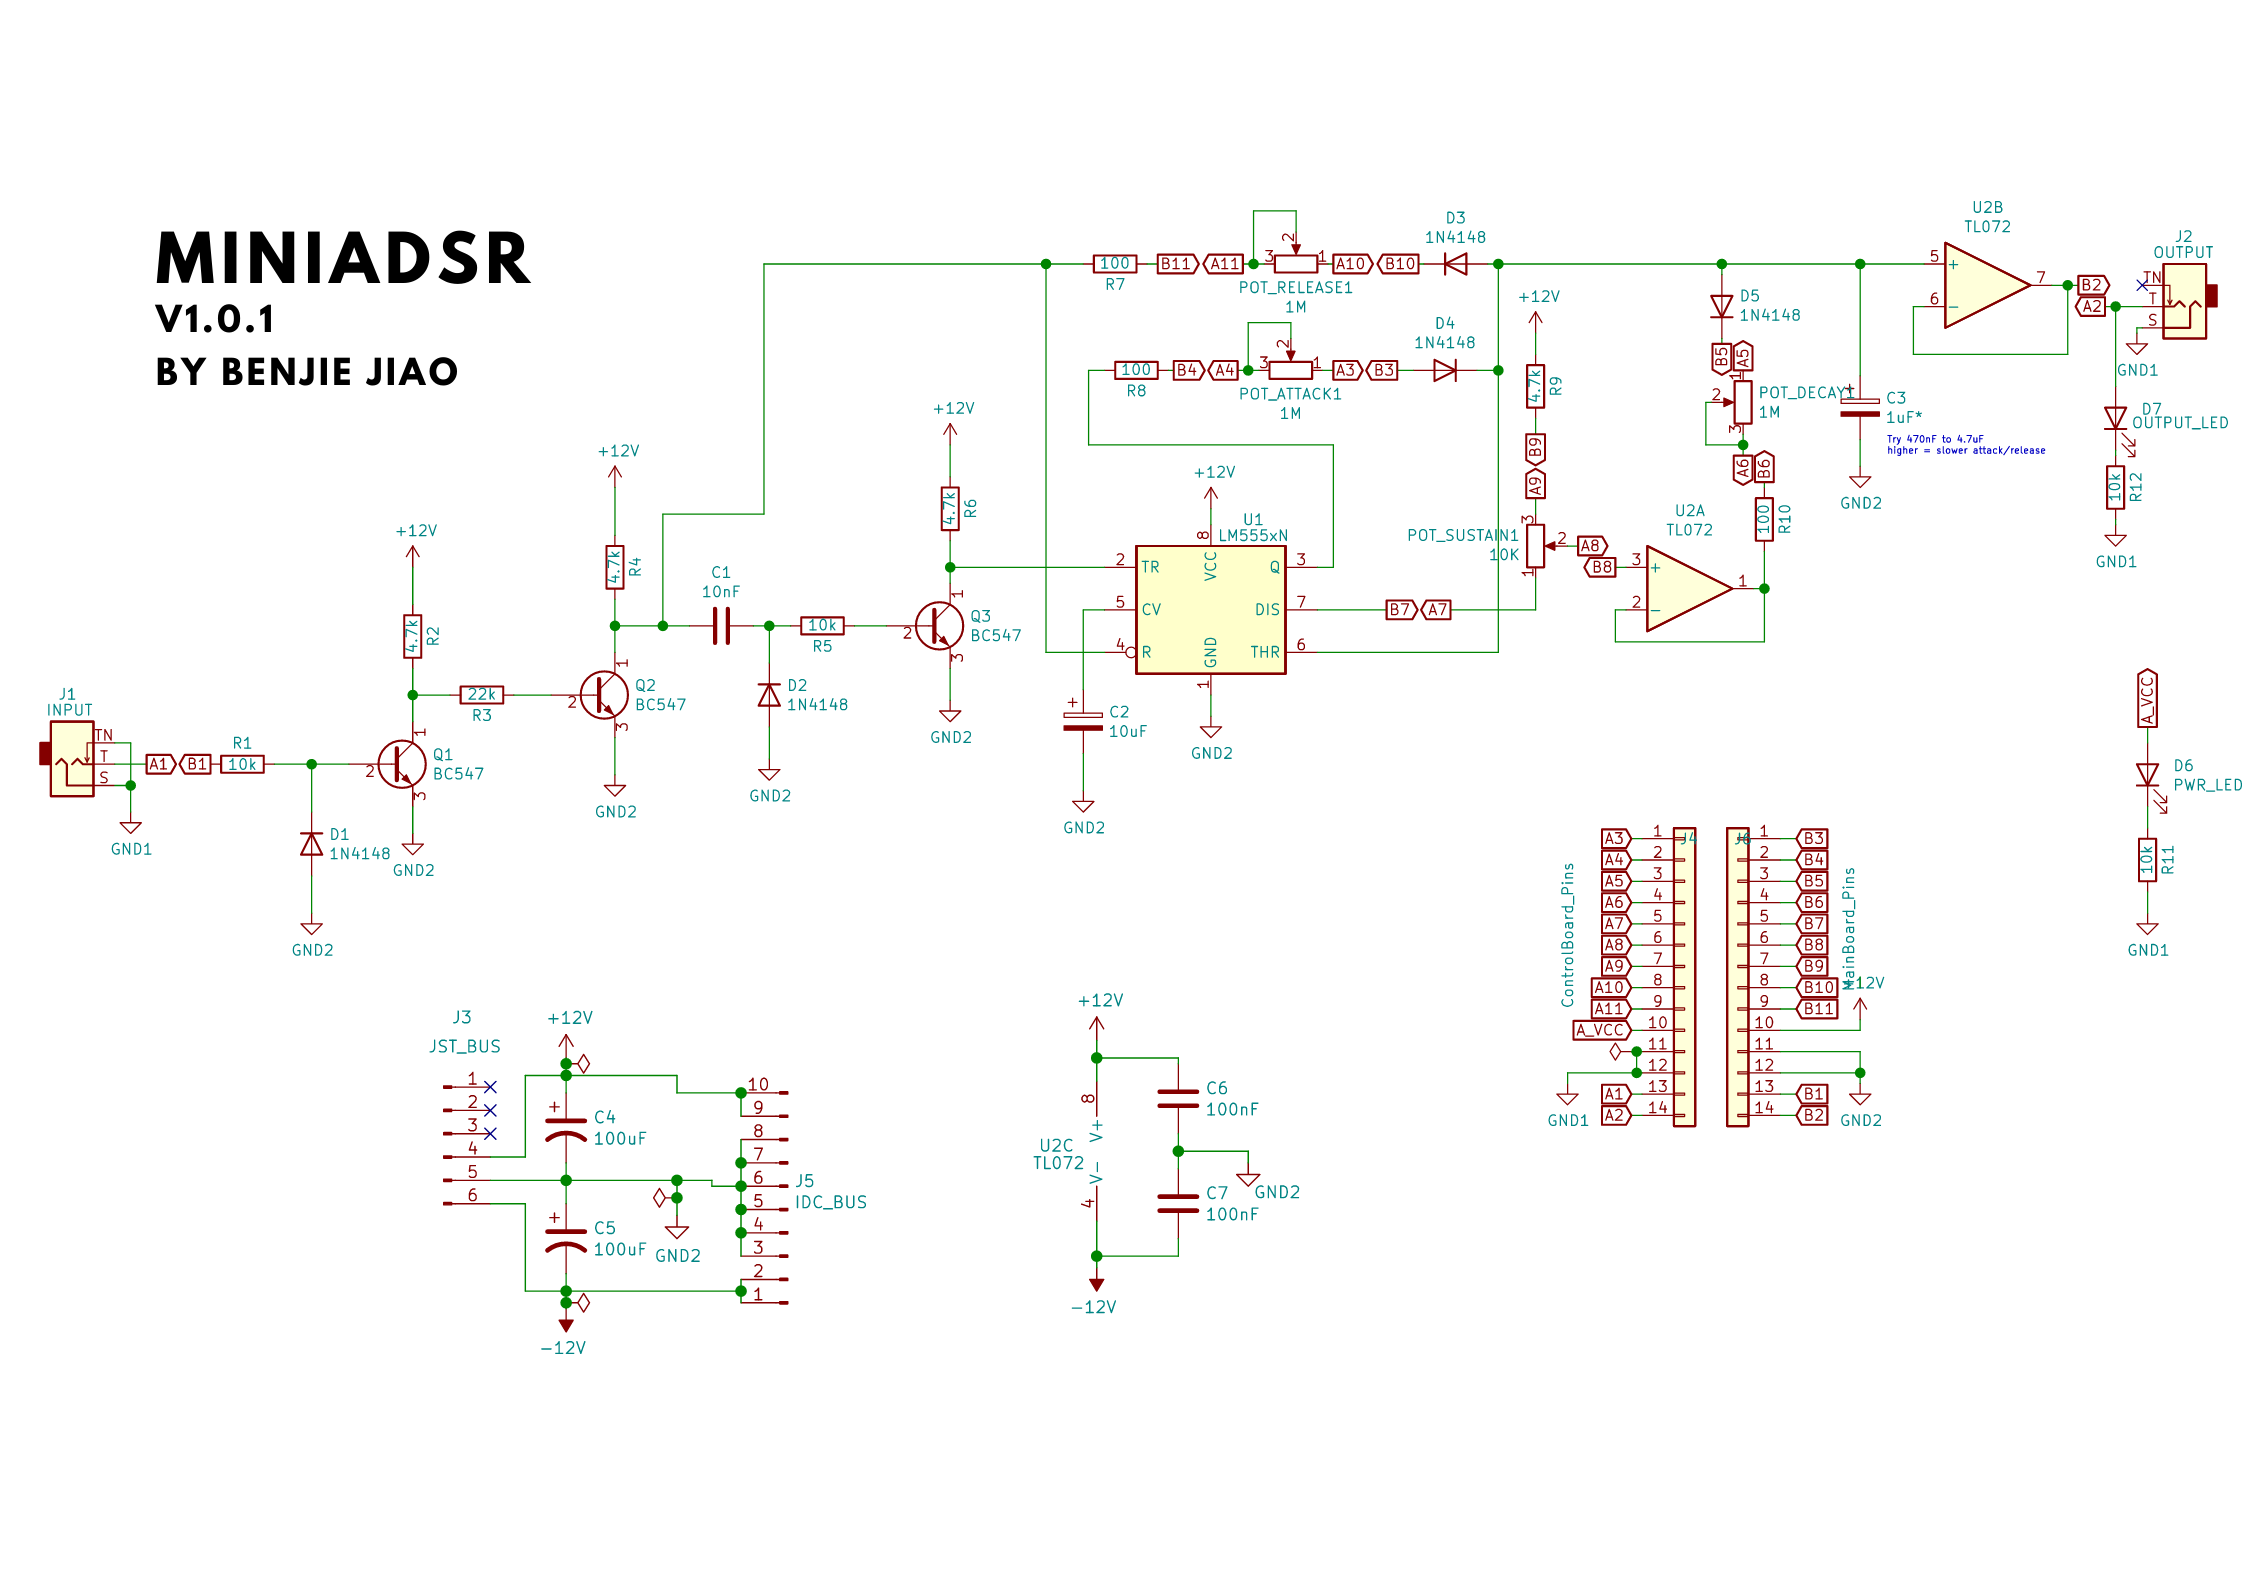
Please don’t mind the weird connector pins. This was done to accommodate the multi-board setup. If you are building it on perfboard/breadboard, just connect matching numbers (eg. A1-B1 will be a point of connection).
PCB
PCB shops use Gerber files for etching copper traces, printing labels, drilling holes, and other manufacturing steps. You can download my zipped Gerber files for a version you like and upload those into their website.
My PCBs in this series were sponsored by PCBWay – a great option for prototyping. Use their Quick-order PCB tool to get an instant quotation on the files.
Check out the PCBWay community page to order the PCBs directly from them:
This build requires three PCBs: Main, Control, and Front. Make sure to print all three of them!
Versions
1.0.1. Minor fixes
Addresses issues present in v1.0.
- Fixed connection of R7 to Q2 pin 1.
- Updated C2 value to 10uF.
- Change sustain pot from 1M to 10k.
- C3 from 100uF to 1uF.
- Added version numbers.
| Title | Filename |
|---|---|
| Schematics | MiniADSR 1.0.1.pdf |
| Gerber Files | MiniADSR 1.0.1 - Main.zip |
| MiniADSR 1.0.1 - Control.zip | |
| MiniADSR 1.0.1 - Front.zip |
1.0. Initial Design
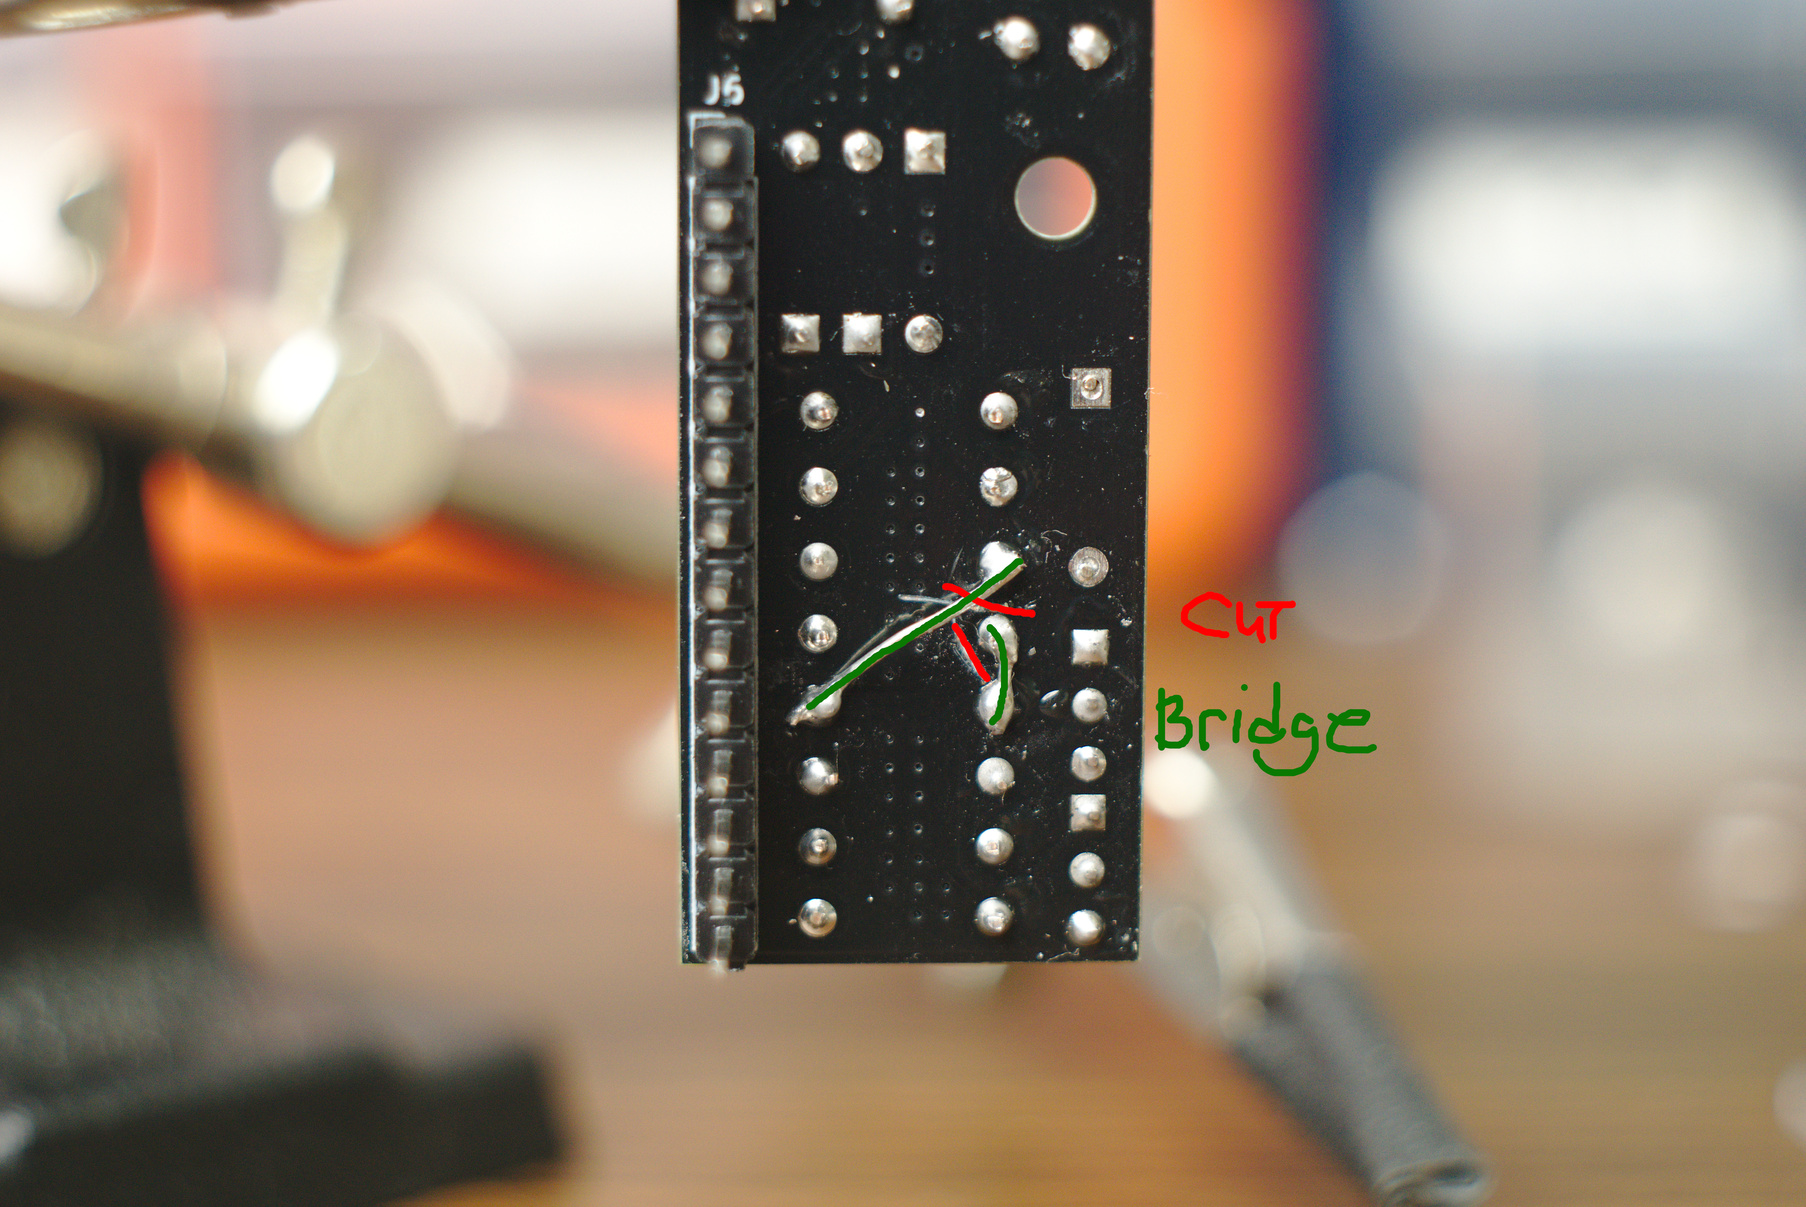
This has some issues that require bodging.
- Wrong connection from R7. This requires modification of PCB traces if you really want to build using this version.
- Wrong value for C2, C3, and Sustain pot.
Some build notes
Connections between panels
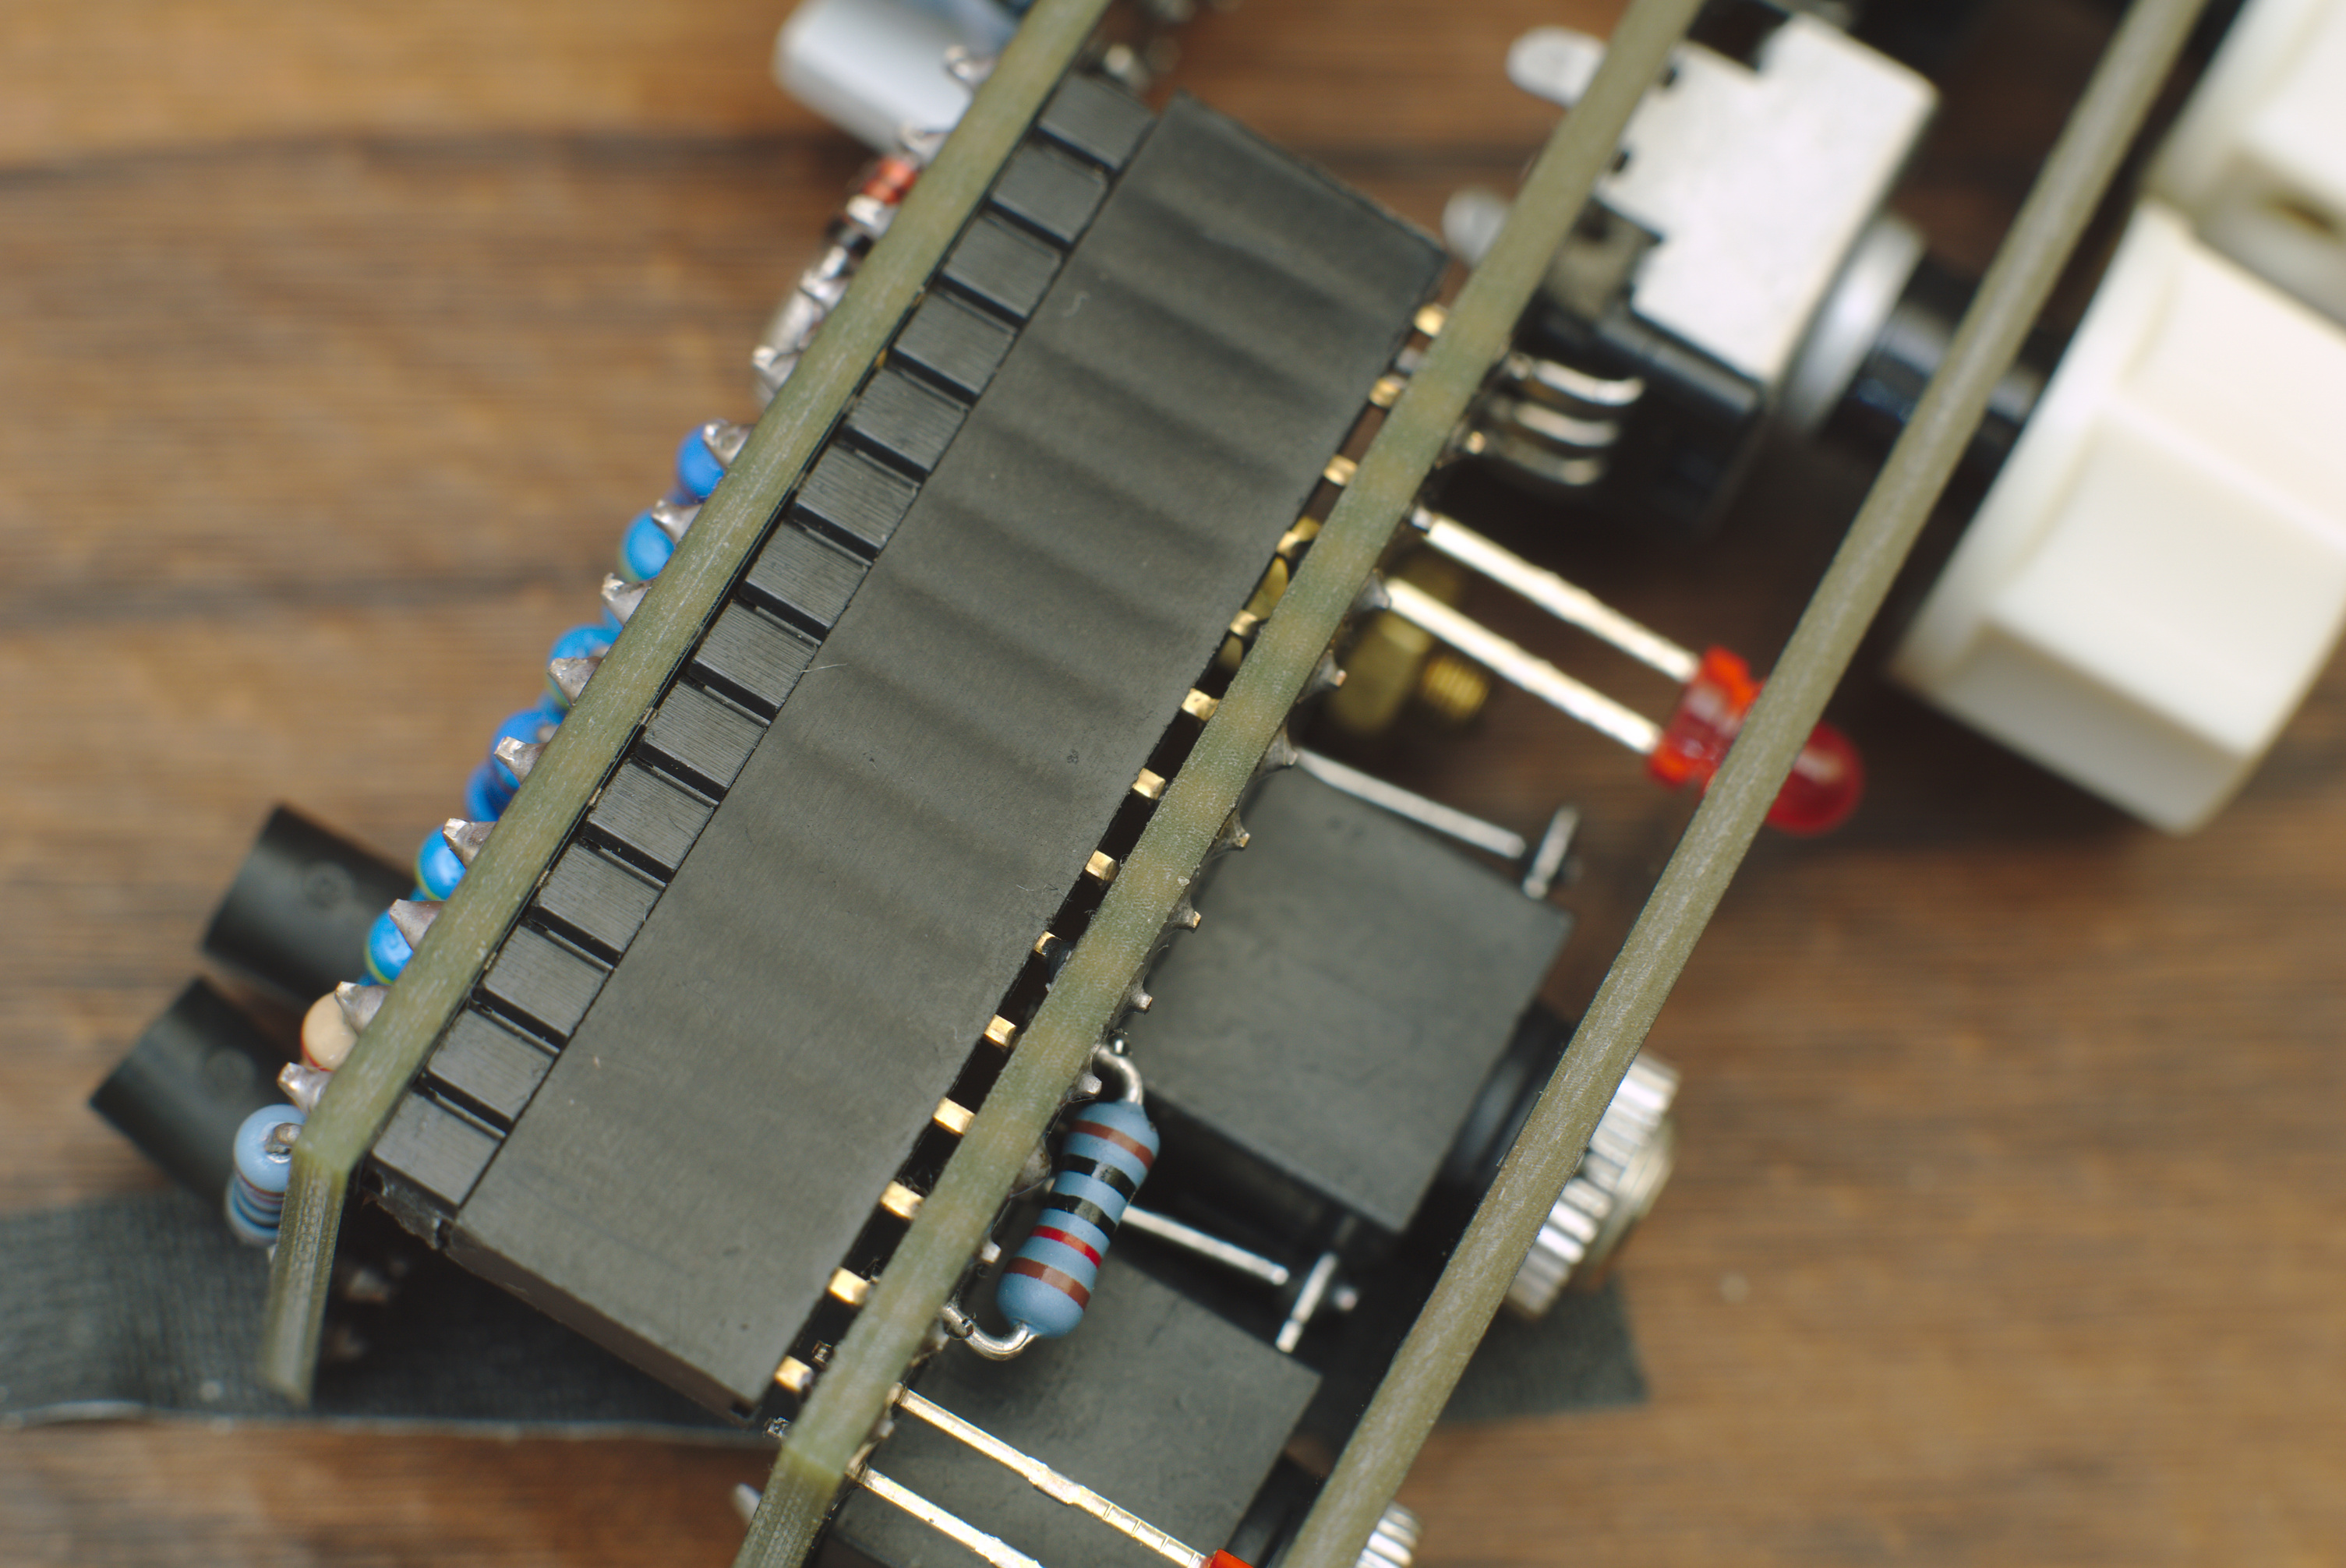
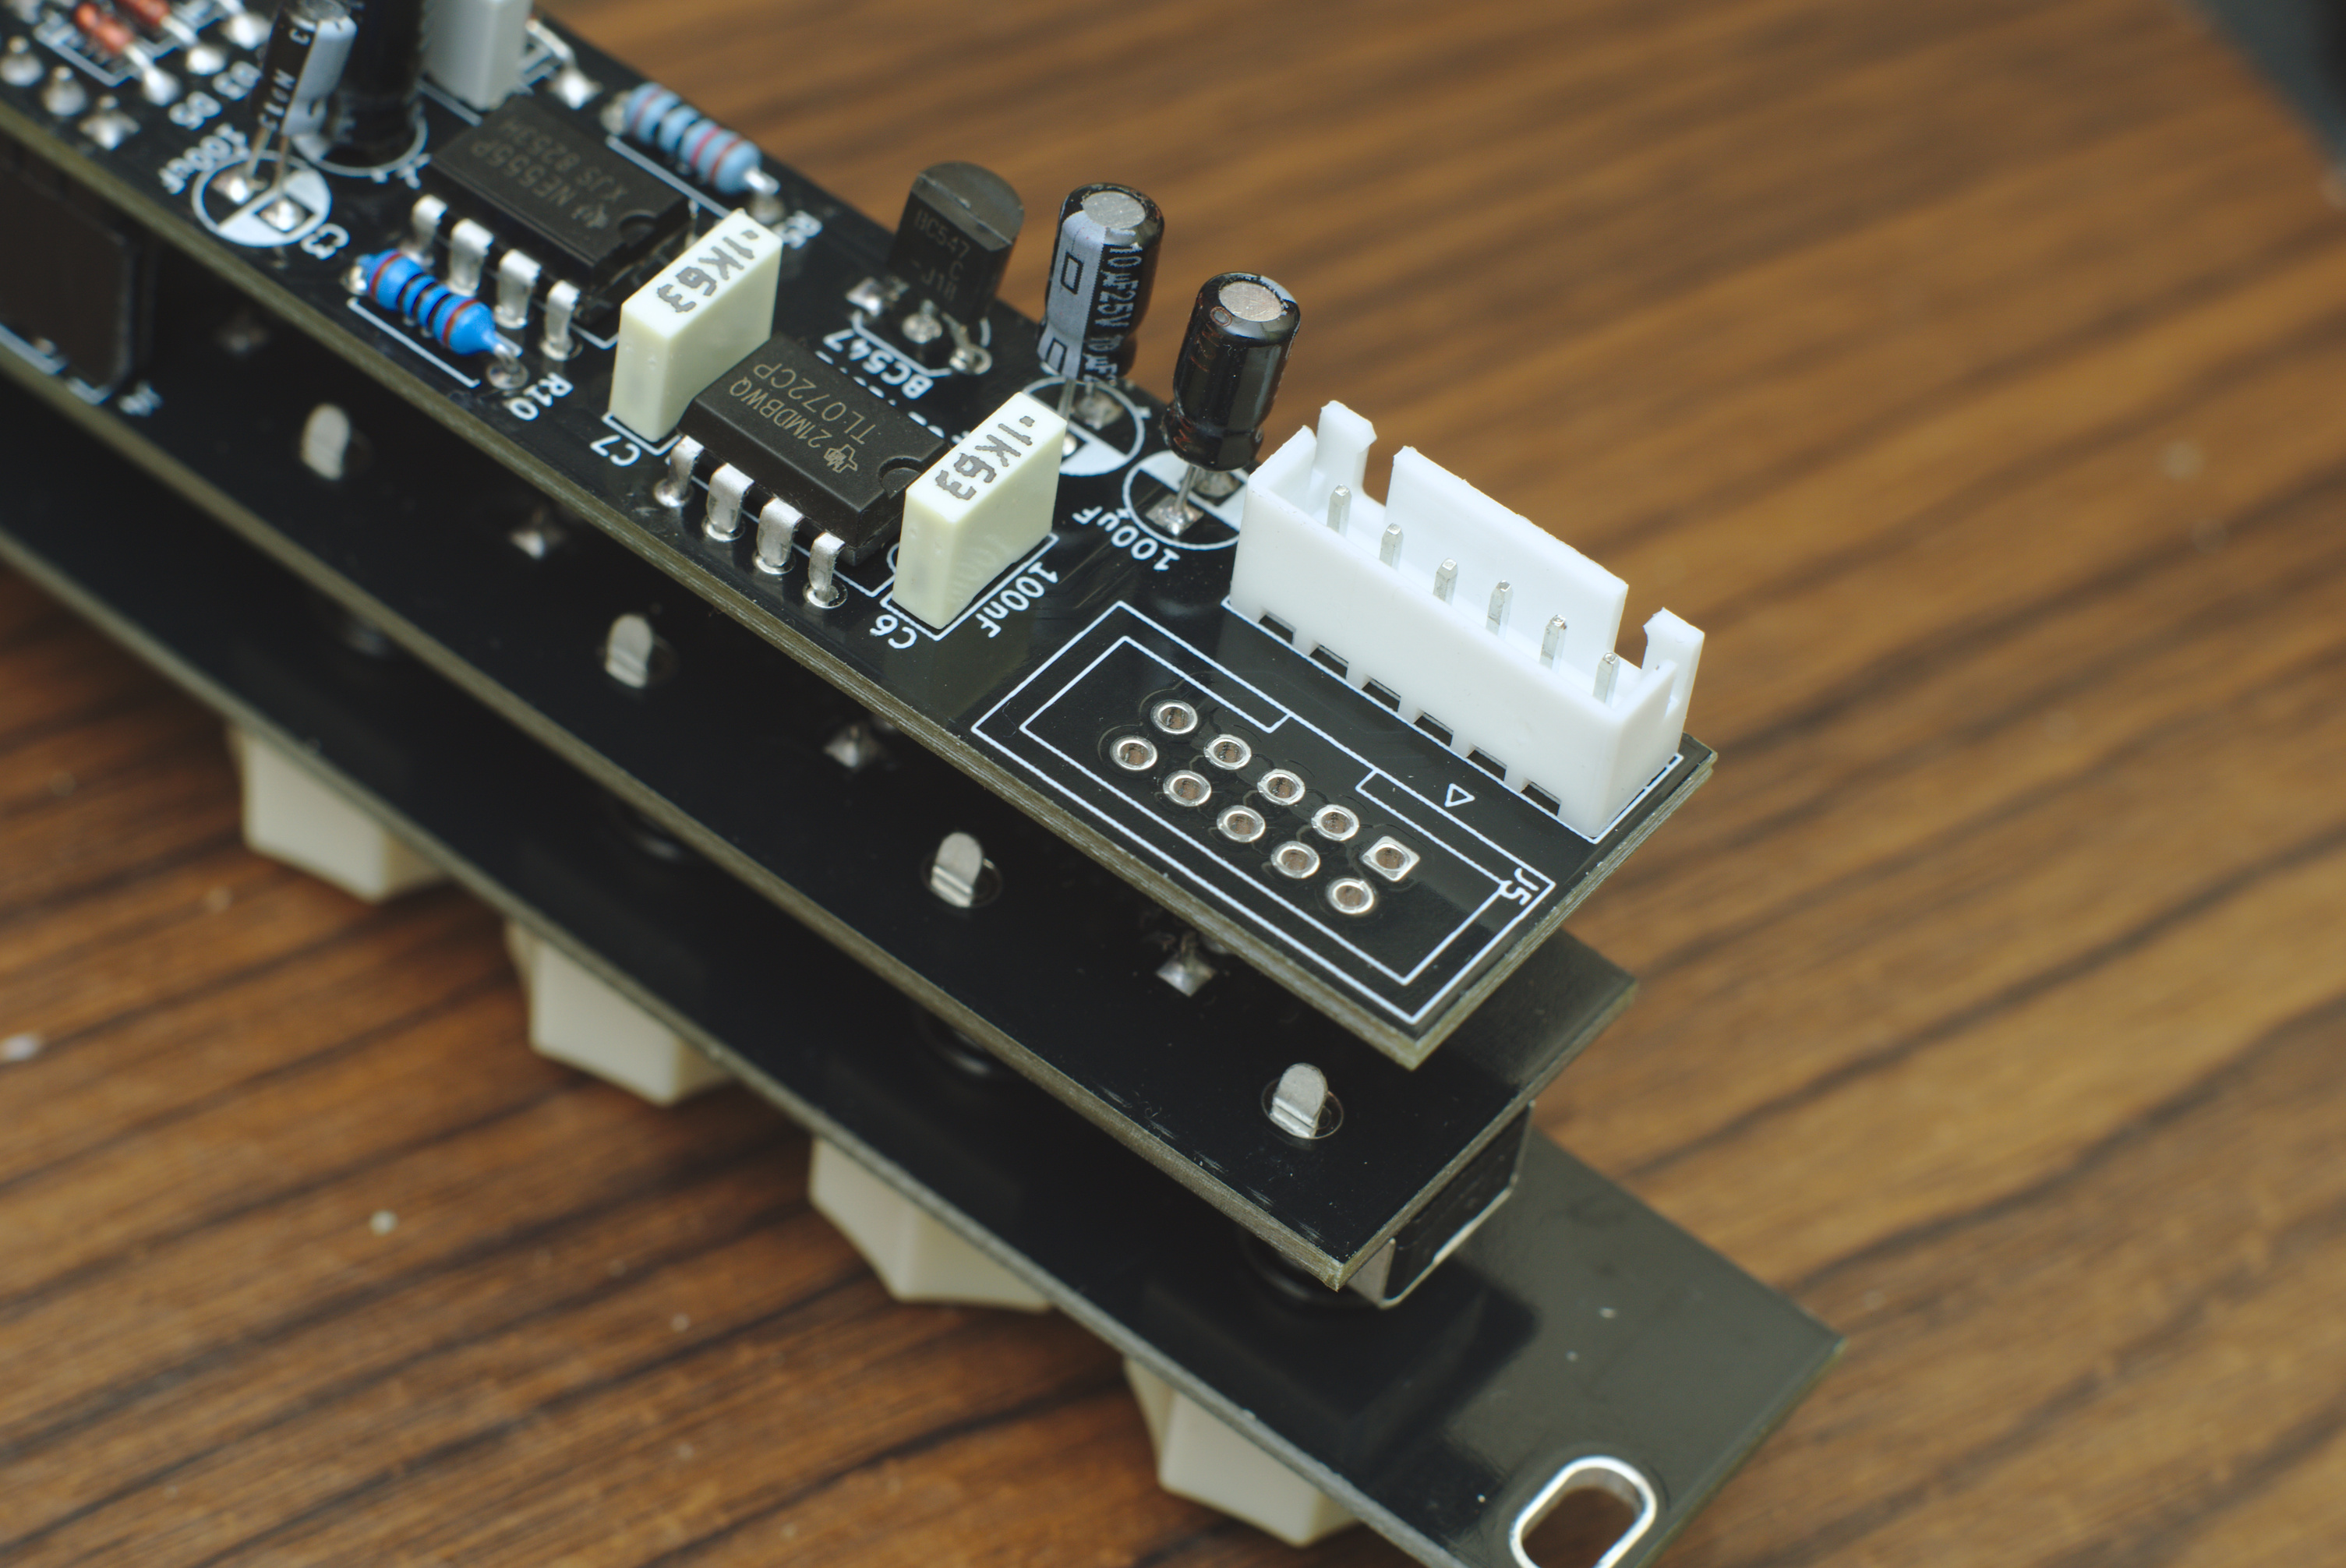
The front panel and the control board are held together by the 3.5mm audio jacks. The control board and the main board are coupled at two points: the 12mm M3 brass standoff and the 16-pin headers.
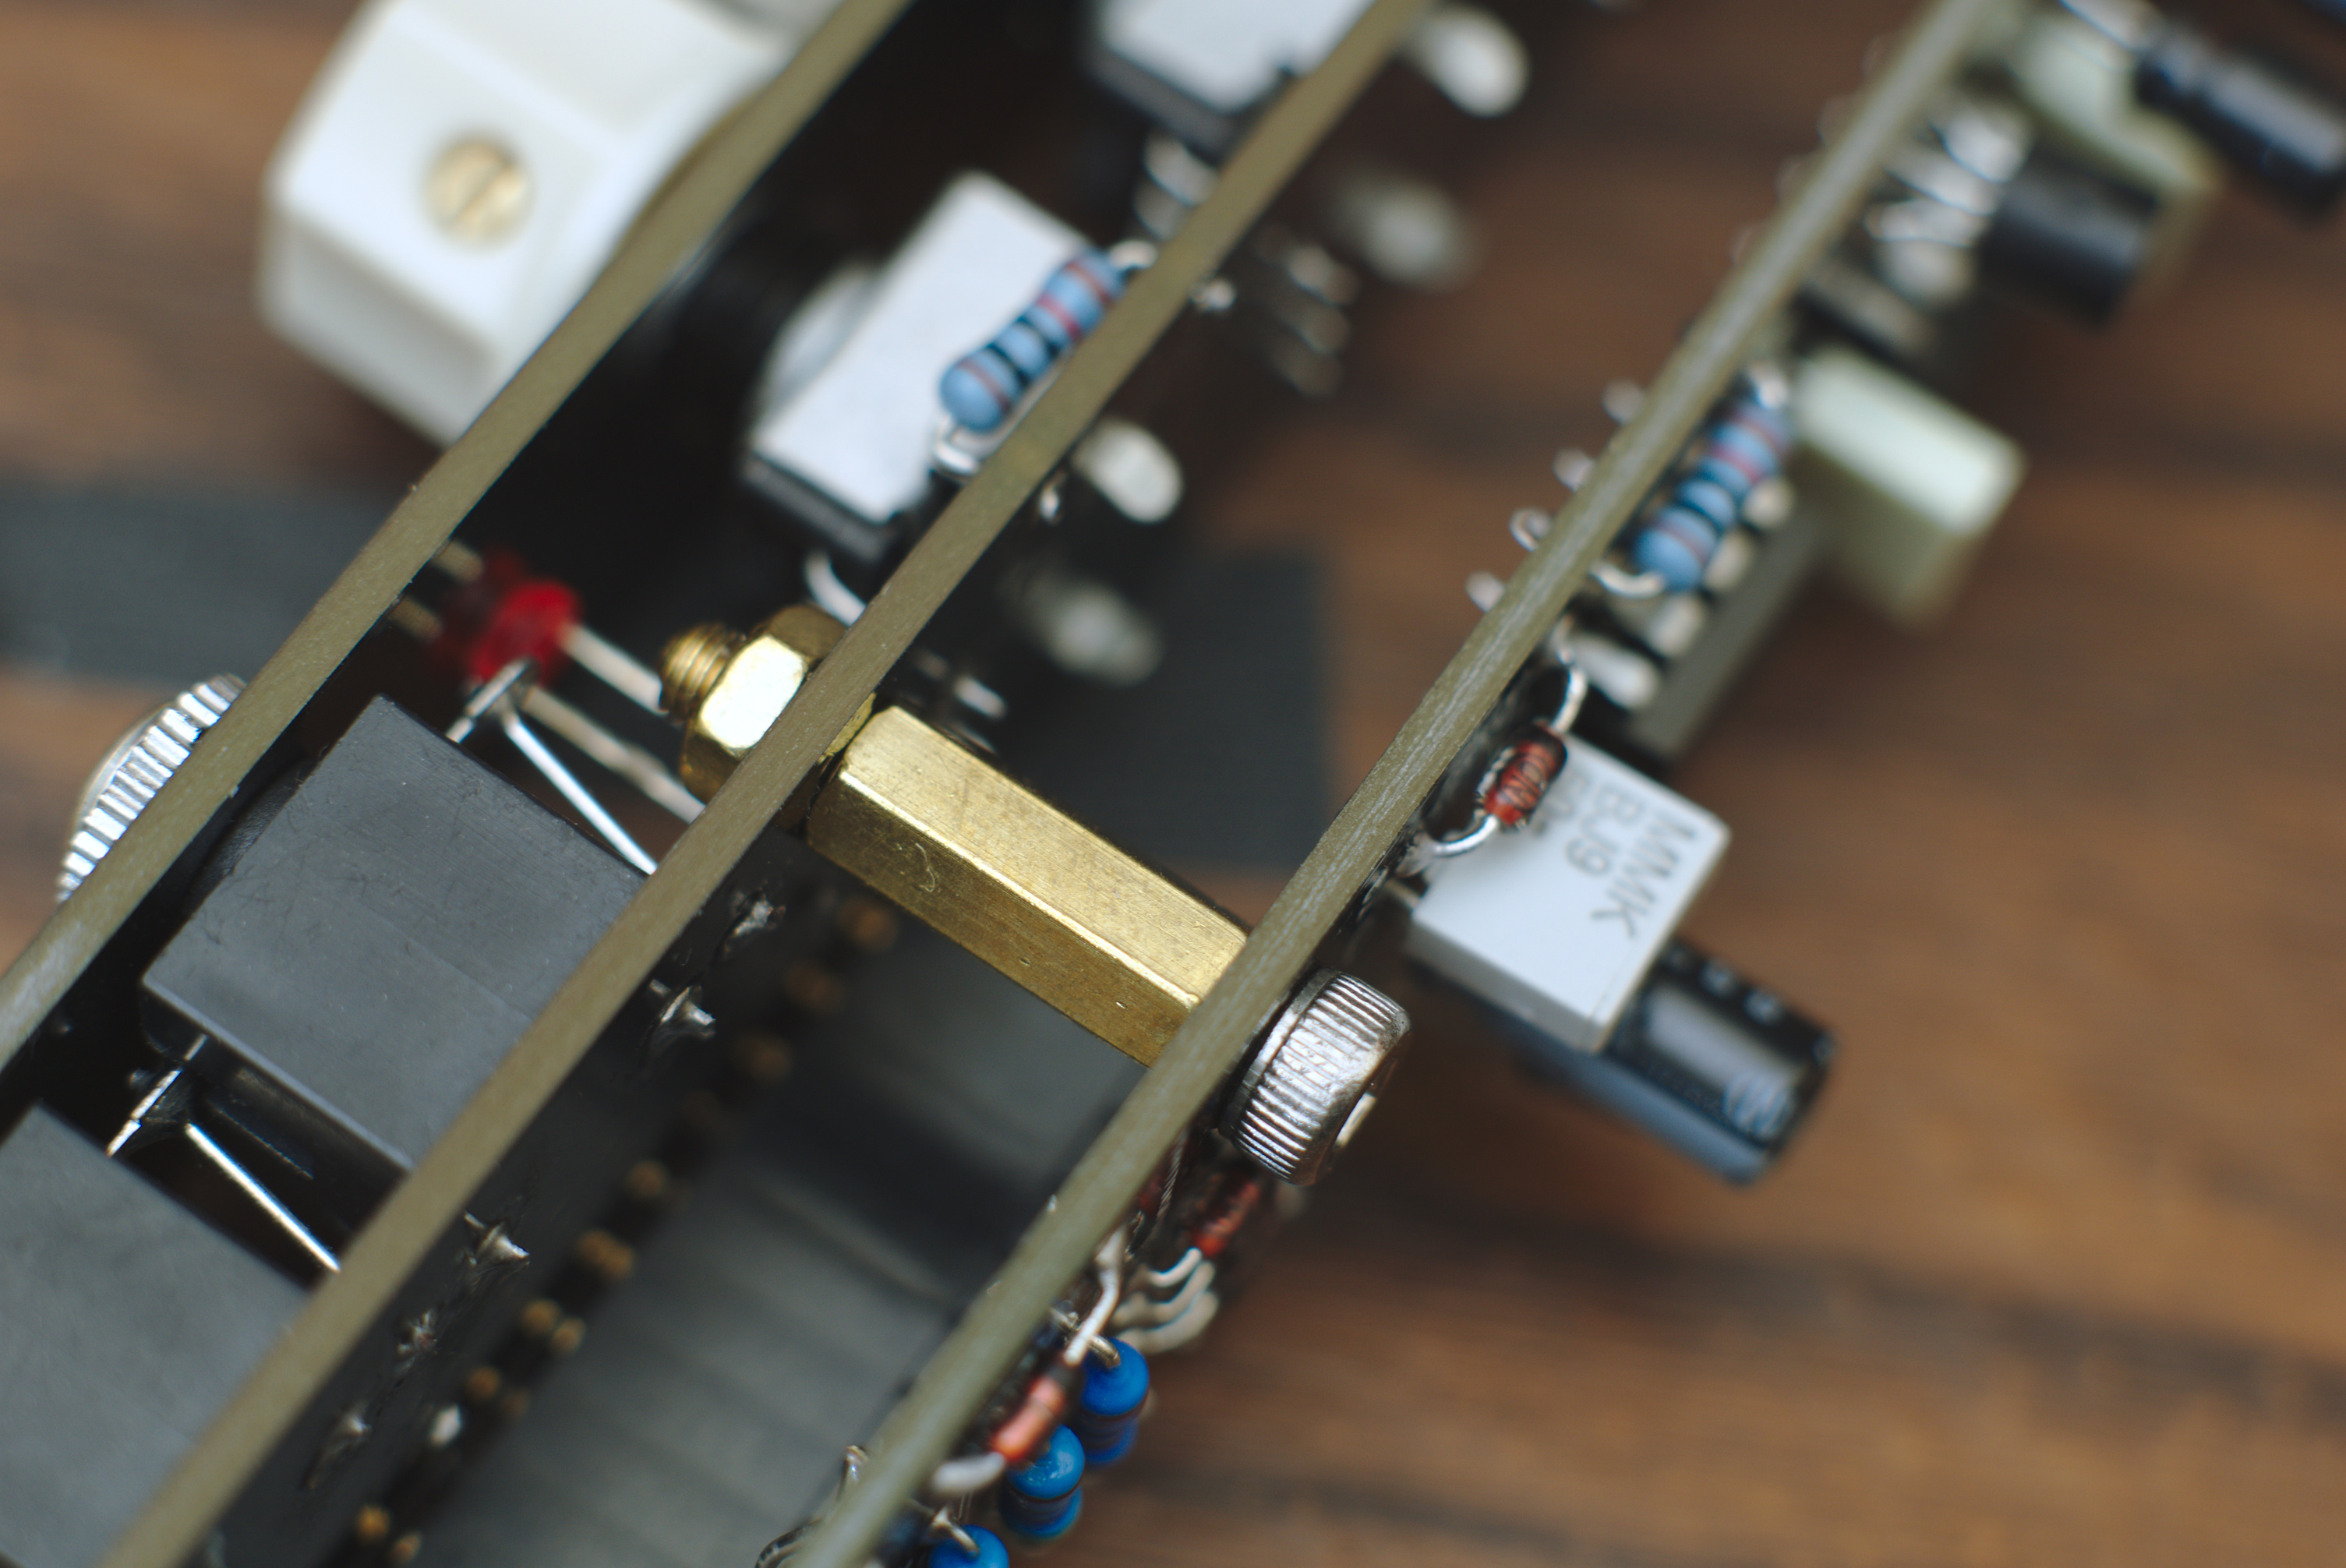
The pins also carry power and audio signals between the two boards.
The photo shows a bit of space between the pin socket and the board. I tried to use a 11mm M3 brass standoff but it seemed too short. I recommend installing the standoff before soldering to ensure that the boards end up parallel to each other.
Power options
I provided two possible options for powering these boards:
- The first one is a standard 2x5 IDC connector found in most Eurorack modules. This is the one I’d recommend if you already have a Eurorack system.
- The second one is a 6-pin JST header which I use for all my modules. I find the more compact and easier to buy where I’m from.
You’ll only have to pick one to use on your board.
Custom KiCad footprints
I made my own footprint for the RV09-type potentiometers as well as some guide lines for the panels. Download and install it if you wan’t to modify the PCB. You can find my KiCad footprint libraries on Github.
Tests
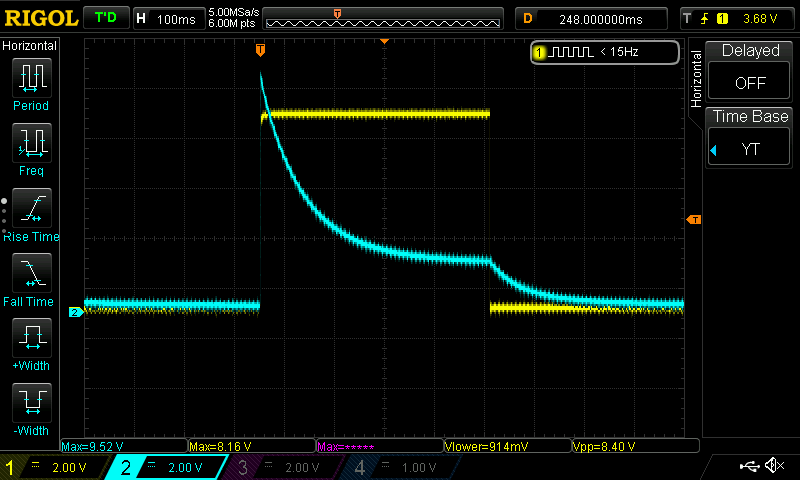
Test setup
The range of attack, decay, and release times are dictated by C3. I ran a couple of tests with my oscilloscope to help you decide on the value to use. I recorded the output at different knob positions (minimum, 9 o’clock, 12 o’clock, 3 o’clock, and maximum).
Results
Attack duration tests were done with the decay and knobs at minimum and sustain knob at max. Decay and release duration tests were done with sustain at max.
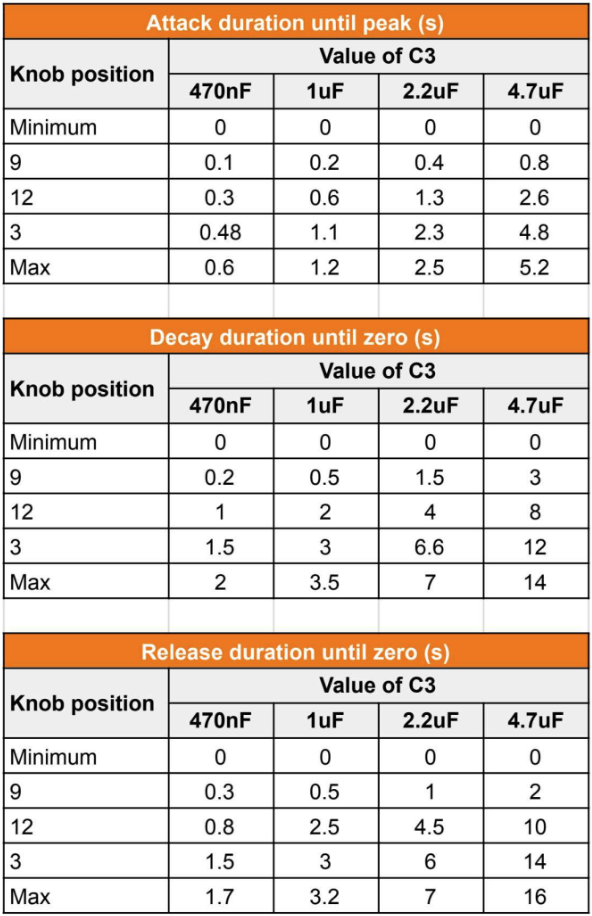
I found that the lower values were useful for short generative bleep-bloops, while the higher values were useful for long swells especially when performing with a keyboard.
My plans for v1.1 will include a range switch that would add a capacitor in parallel to make both short and long range options available in one module.
Demos
You can watch my demo and build video of my PCB version on Youtube.
I also built this module on perfboard last year. You can find a demo in my ADSR Envelope Generatorpost or on Youtube channel:
Conclusion
I’m pretty happy with how this module turned out. I’m working on a more full featured version of this and looking into a range switch and a manual trigger button.